Yes, I said hasselback. And no, not Hasselhoff (although if I were German, I'd likely worship the ground he walks on too). Word on the street is that they originated from a Stockholm restaurant, although I'd almost as likely guess they were named after Mr. Hasselhoff himself (I think I just want that to be true). To me, they are beautiful glorified potatoes. Just look at how pretty they are!
Like many of us, I love me some spuds but am always searching for an easy way to jazz them up a bit. Hasselback potatoes are the key! Scrub and wash each potato, slice like an accordion, and season or spice to your liking. This time around I used a number of seasoning blends from my spice cabinet after I had oiled these little babies up, then I stuffed them with sliced garlic and good salted butter. The end result was amazing!
I paired these sliced golden wonders with a delicious boneless pork chop (recipe to follow soon-ish) and some gently steamed broccoli drizzled in Braggs.
And of course a wonderful Oregon pinot noir wine as accompaniment. Silvan Ridge, a personal favorite. If you haven't ever had a bottle from their coffers, I encourage you to go to your local wine shop and purchase one for your next meal. But for now, I suggest everyone visit the FoodGawker page for hasselback potatoes and find the recipe most suitable for your dinner (or binge eating) needs. Mmmm, starchy comfort food!
Sunday, January 27, 2013
Wednesday, January 16, 2013
Chicken Potpie Casserole & Oven Woes
Well, my oven has decided it doesn't want to work properly. It overheats, not cooking dishes properly, which is likely due to having one of the heating elements fail. I have to give it credit as it is ancient, as in it was likely put in sometime around the 1970s. Who even knew that GM made ovens? I certainly didn't until I moved into this house. And this is my first go around with a wall unit style oven (makes for keeping the house warm).
Check out these old appliances; the photo about seven pics down is a spitting image of my (failing) kitchen gem. As I am currently in a rental, there is little hope of having it replaced before I move. So I make due by altering my baking and roasting times, usually turning the dial down by about 25 or more degrees. I also rotate everything once every five or so minutes. Even with the extra care and attention, one in four baking attempts result in charred bottoms. Le sigh...
One of the recent dishes which successfully made it out of my needy oven was a Chicken Potpie Casserole. If you are anywhere near my neck of the woods, you have likely survived the insane amount of rain we've had (it feels like Oregon weather around here). And what goes great with rain? Casserole and biscuits!
Over the weekend I had made a baked chicken, seasoned with rosemary and oranges (based loosely on this recipe), and had a need to use up the leftovers. I usually make Chicken Potpie using some sort of pastry dough/pie shell I have in the freezer, in a more traditional fashion. After some online exploring, I came across this recipe for Chicken Potpie Casserole from Taste of Home which suited my needs perfectly. As I already had a heaping portion of chicken gravy leftover from the chicken dinner, plus some mashed potatoes, I modified this recipe a bit. I also am not a lover of peas, so I replaced them with chopped celery. And the pimentos from the original recipe just didn't scream down home cooking to me, so I omitted them.
The end result was simply amazing. This just may be the best Chicken Potpie recipe I have ever come across and made. Part of that may be due to how awesome the original baked chicken was, but I am also giving some credit where it is due - the recipe. Next time you have leftover chicken and have a hankering for some comfort food, give this one a try. Enjoy!
Chicken Potpie Casserole
Adapted from: Taste of Home
Check out these old appliances; the photo about seven pics down is a spitting image of my (failing) kitchen gem. As I am currently in a rental, there is little hope of having it replaced before I move. So I make due by altering my baking and roasting times, usually turning the dial down by about 25 or more degrees. I also rotate everything once every five or so minutes. Even with the extra care and attention, one in four baking attempts result in charred bottoms. Le sigh...
One of the recent dishes which successfully made it out of my needy oven was a Chicken Potpie Casserole. If you are anywhere near my neck of the woods, you have likely survived the insane amount of rain we've had (it feels like Oregon weather around here). And what goes great with rain? Casserole and biscuits!
Over the weekend I had made a baked chicken, seasoned with rosemary and oranges (based loosely on this recipe), and had a need to use up the leftovers. I usually make Chicken Potpie using some sort of pastry dough/pie shell I have in the freezer, in a more traditional fashion. After some online exploring, I came across this recipe for Chicken Potpie Casserole from Taste of Home which suited my needs perfectly. As I already had a heaping portion of chicken gravy leftover from the chicken dinner, plus some mashed potatoes, I modified this recipe a bit. I also am not a lover of peas, so I replaced them with chopped celery. And the pimentos from the original recipe just didn't scream down home cooking to me, so I omitted them.
The end result was simply amazing. This just may be the best Chicken Potpie recipe I have ever come across and made. Part of that may be due to how awesome the original baked chicken was, but I am also giving some credit where it is due - the recipe. Next time you have leftover chicken and have a hankering for some comfort food, give this one a try. Enjoy!
Chicken Potpie Casserole
Adapted from: Taste of Home
- 1 ½ cups sliced fresh mushrooms
- 2/3 cup sliced fresh carrots
- 2/3 cup sliced celery
- ½ cup chopped onion
- 1-2 cups chicken gravy (see original recipe if you don’t have gravy on hand)
- 2-4 cups cubed cooked chicken (any meat works as it’s a casserole)
- Seasonings to taste (salt, pepper, onion powder, etc.)
- Leftover mashed potatoes (optional)
Biscuit Topping
- 2 cups all purpose flour
- 4 tsp. baking powder
- 2 tsp. sugar
- ½ tsp. salt
- ½ tsp. cream of tartar
- ½ cup cold butter, cubed
- 2/3 cup milk
In a large saucepan, sauté the mushrooms, carrots, and onion
in butter until tender. If you don’t have gravy on hand, revert to the original
recipe and follow the step by sprinkling flour into the pan. If you do have
gravy on hand, add the chicken and heat through. Next add the celery and
seasonings. Follow with adding the gravy to the pan and stir until well combined. If you have leftover mashed potatoes, scoop little spoonfuls of it into the prepped casserole dish, and then pour the mixture over the top. If you don't have pre-made gravy, you will have already made some in cooking the mixture and can go straight to pouring the mixture into a greased 2 to 2 ½ quart baking dish, then set aside.
Preheat oven to 400 F degrees.
In a large bowl combine flour, baking powder, sugar, salt,
and cream of tartar. Cut in the cold butter until the mixture resembles coarse
crumbles. Stir in the milk until just moistened. Turn onto a lightly floured
surface and knead 8-10 times. Pat or roll out the dough to about a ½”
thickness. Cut with a floured 2 ½” biscuit cutter or use the rim of a glass.
Place the biscuits over chicken mixture. Bake uncovered at
400 F degrees for 15-20 minutes or until the biscuits are golden brown. Serve
warm and eat lots.
Labels:
biscuits,
casseroles,
chicken,
comfort food,
leftovers,
repurpose
Sunday, January 6, 2013
Welcome 2013!
The new year is here, just like every year that came before it. And with it comes a slightly too long list of goals, wishes, and ambitions for spending 2013 the best way possible. Or at least for me it does. Since this is the baking corner of my world, I figured I'd share my 2013 wishlist with all of you fabulous folks.
- Learn to use my spiffy new, upgraded KitchenAid properly.
- Become better with working with flaky dough.
- Improve my tart making skills.
- Go on a foodie vacation to somewhere amazing (yes, please feel free to join me).
- Take a skill-improving class.
- Develop my idea for a B&B/patisserie experience.
- Donate some of my baking time to a local non-profit or for a good cause.
- Network with my local foodies, hello NC!
- Improve this foodie corner of the world.
- Return to my beloved biking for as many reasons as possible (transportation, socializing, moving around baked goods, and plain ol' fun).
Happy new year & may all of your 2013 baking & biking endeavors be splendid!
Friday, December 28, 2012
Classic Pumpkin Pie with Bourbon Whipped Cream
In my arsenal of recipes, I have a few favorites when it comes to a basic pumpkin pie. First and foremost, I am a huge fan of growing pumpkins in the garden and using fresh pumpkin puree in any pie recipe. That being said, for some reason I don't always get a good turnout when it comes to growing pumpkins (or I am plain lazy) and resort to the canned stuff. You can definitely taste a difference, though, and of course when you grow your own you know where the stuff is coming from.
Next, I need to confess that I am a lover of simple, basic pumpkin pie recipes. No flashy stuff here (although the streusel topping is yummy). Give me a good, solid pie crust recipe and fill it with a traditional pumpkin pie filling any day. One of the recipes I return to again and again is the Eagle Brand pumpkin pie recipe. Yes, I'm referring to the one on the back of the Eagle Brand Condensed Milk can that most of us grew up with. Now before you start harping on me for not having ingenuity, let me defend myself by saying if it ain't broken, don't fix it. That is a great basic pumpkin pie recipe and given the pie dough used, it can become even better.
For most of the big holiday dinners this year, this is the pie I contributed and always with success. The bourbon whipped cream is what makes this pie shine, although any type of whipped cream or topping will work. I've swapped out the bourbon for rum or even frangelico before and simply loved it. I've tried this pie with store bought, ready to bake pie crust, with homemade ground hazelnut crust, with streusel topping, with chocolate mixed into the recipe. You name it, I've likely doctored up this recipe trying it once upon a time. And the basic core of this pumpkin pie never does me wrong. So I encourage all you budding pie makers to jump into the pool with this recipe and see where it takes you. Happy holidays! Nom nom nom...
Classic Pumpkin Pie Recipe with Bourbon Whipped Cream
Adapted from: Eagle Brand Pumpkin Pie & Bourbon Maple Whipped Cream
Reduce oven temperature to 350 degrees F and continue baking 35 to 40 minutes or until knife inserted 1 inch from crust comes out clean. Cool. Garnish as desired. Store leftovers covered in refrigerator.
Next, I need to confess that I am a lover of simple, basic pumpkin pie recipes. No flashy stuff here (although the streusel topping is yummy). Give me a good, solid pie crust recipe and fill it with a traditional pumpkin pie filling any day. One of the recipes I return to again and again is the Eagle Brand pumpkin pie recipe. Yes, I'm referring to the one on the back of the Eagle Brand Condensed Milk can that most of us grew up with. Now before you start harping on me for not having ingenuity, let me defend myself by saying if it ain't broken, don't fix it. That is a great basic pumpkin pie recipe and given the pie dough used, it can become even better.
For most of the big holiday dinners this year, this is the pie I contributed and always with success. The bourbon whipped cream is what makes this pie shine, although any type of whipped cream or topping will work. I've swapped out the bourbon for rum or even frangelico before and simply loved it. I've tried this pie with store bought, ready to bake pie crust, with homemade ground hazelnut crust, with streusel topping, with chocolate mixed into the recipe. You name it, I've likely doctored up this recipe trying it once upon a time. And the basic core of this pumpkin pie never does me wrong. So I encourage all you budding pie makers to jump into the pool with this recipe and see where it takes you. Happy holidays! Nom nom nom...
Classic Pumpkin Pie Recipe with Bourbon Whipped Cream
Adapted from: Eagle Brand Pumpkin Pie & Bourbon Maple Whipped Cream
- 1 (15 oz) can of pumpkin puree
- 1 (14 oz) can Eagle Brand Sweetened Condensed Milk
- 2 large eggs
- 1 teaspoon ground cinnamon
- 1/2 teaspoon ground ginger
- 1/2 teaspoon ground nutmeg
- 1/2 teaspoon ground allspice
- 1/2 teaspoon salt
- 1 (9 inch) unbaked pie crust
Reduce oven temperature to 350 degrees F and continue baking 35 to 40 minutes or until knife inserted 1 inch from crust comes out clean. Cool. Garnish as desired. Store leftovers covered in refrigerator.
- Bourbon Whipped Cream
- 1 1/4 cups heavy cream, very cold
- 1/2 vanilla bean, split lengthwise, seeds scraped out and reserved
- 1/2 to 1 teaspoon vanilla extract
- 2 tablespoons Grade B maple syrup
- 1 to 3 tablespoons bourbon
Combine the cream, vanilla seeds, vanilla extract, maple syrup, and bourbon, to taste, in a large chilled bowl, and whip until soft peaks form. Scoop dollops onto individual pieces of pie.
Thursday, December 27, 2012
Holiday Travels: Key West
When the opportunity arose for me to steal a few days in Key West, FL around the holidays, I jumped on it. Nearly 20 years had passed since my last visit to the quirky island and I needed no more coaxing to return than an airplane ticket and the lure of sunshine. Hence I found myself recently in the Conch Republic.
For any of you who haven't been in recent years, it's more or less the same. Just more developed (like everywhere else in the world). The island now boasts more incoming and outgoing flights, a large shopping center, more hotels and inns, more eateries, more, more, more. But the general laid back vibe is still present, and the sun is still shining bright, and the sunsets are still just as amazing. And you can still find at the local watering hole a few kids who moved down to the island in hopes of stepping away from real life and never left.
Not waiting to be bombarded by the annoying hotel crowd, I opted for a quiet stay at a local B&B: the Atlantis House. What a pleasant surprise! A locally owned and family run small B&B located close to the beach and within easy walking/biking distance of the main drag, the Atlantis House was a fantastic stay.
The property had two beautiful suites, both with in-room jacuzzi tubs, free bike rentals, a stellar patio to sit and enjoy a mellow island moment, and I was fed some of the best baklava and key lime pie of my life. If you are heading to Key West, STAY HERE. You can send me a postcard later in thanks.
And being the foodie fanatic I am, I ate my way around the island. One of my first stops: Lupita's. Filling, simple, delicious, Lupita's was a wonderful tucked away spot for some traditional Mexican food and cokes. This was the perfect place to go for an inexpensive feast that was easy on the wallet. Their salsa was muy delicioso.
Another spot I sampled: Banana Cafe. This establishment is on the main tourist drag, had a lot of hype about it's awesome breakfast (especially eggs benedict), and was recommended through a few foodie sites. Honestly, I wasn't blown away. The food was good, but not great and not worth the hype in my book. They managed to get my order wrong, but promptly fixed it, and just didn't seem to have their act together as there was a lot of staff discussions going on (constantly). A few orders at nearby tables also appeared to be wrong and it took a long while to get our dirty plates cleared (pet peeve in my book) as well as our check. Would I go back? Eh, probably not. But you should try it for their crepes - they are also supposed to be amazing. And the view from the upstairs patio is wonderful for people watching.
The shining gem of all the food sampled: Santiago's Bodega. I had sworn I had taken a ton of pictures of the many (many!) tapas plates I sampled, alas I was too busy eating as I don't have a single one. I tried their beef carpaccio, prosciutto wrapped goat cheese stuffed figs, beef short ribs, pork skewers (heavenly), patatas bravas, and more. Everything was outstanding. What I also managed to find was a bottle of some of the best tasting wine of my life. Along with this, I met wonderful patrons at the tables next to me as I devoured some of the best tapas to pass my lips. Santiago's was outrageously good! And well worth every penny spent. I would return in a heartbeat and likely eat a meal there once a day on my next Key West journey.
And last but not least, I made a point to swing into Havana 1 for a little authentic Cuban food. After a delicious meal of roast pork which melted in my mouth and some of the best plantains ever, the owners treated me to some homemade flan (complete with a chocolate sauce rose). Needless to say I was blown away by the food!
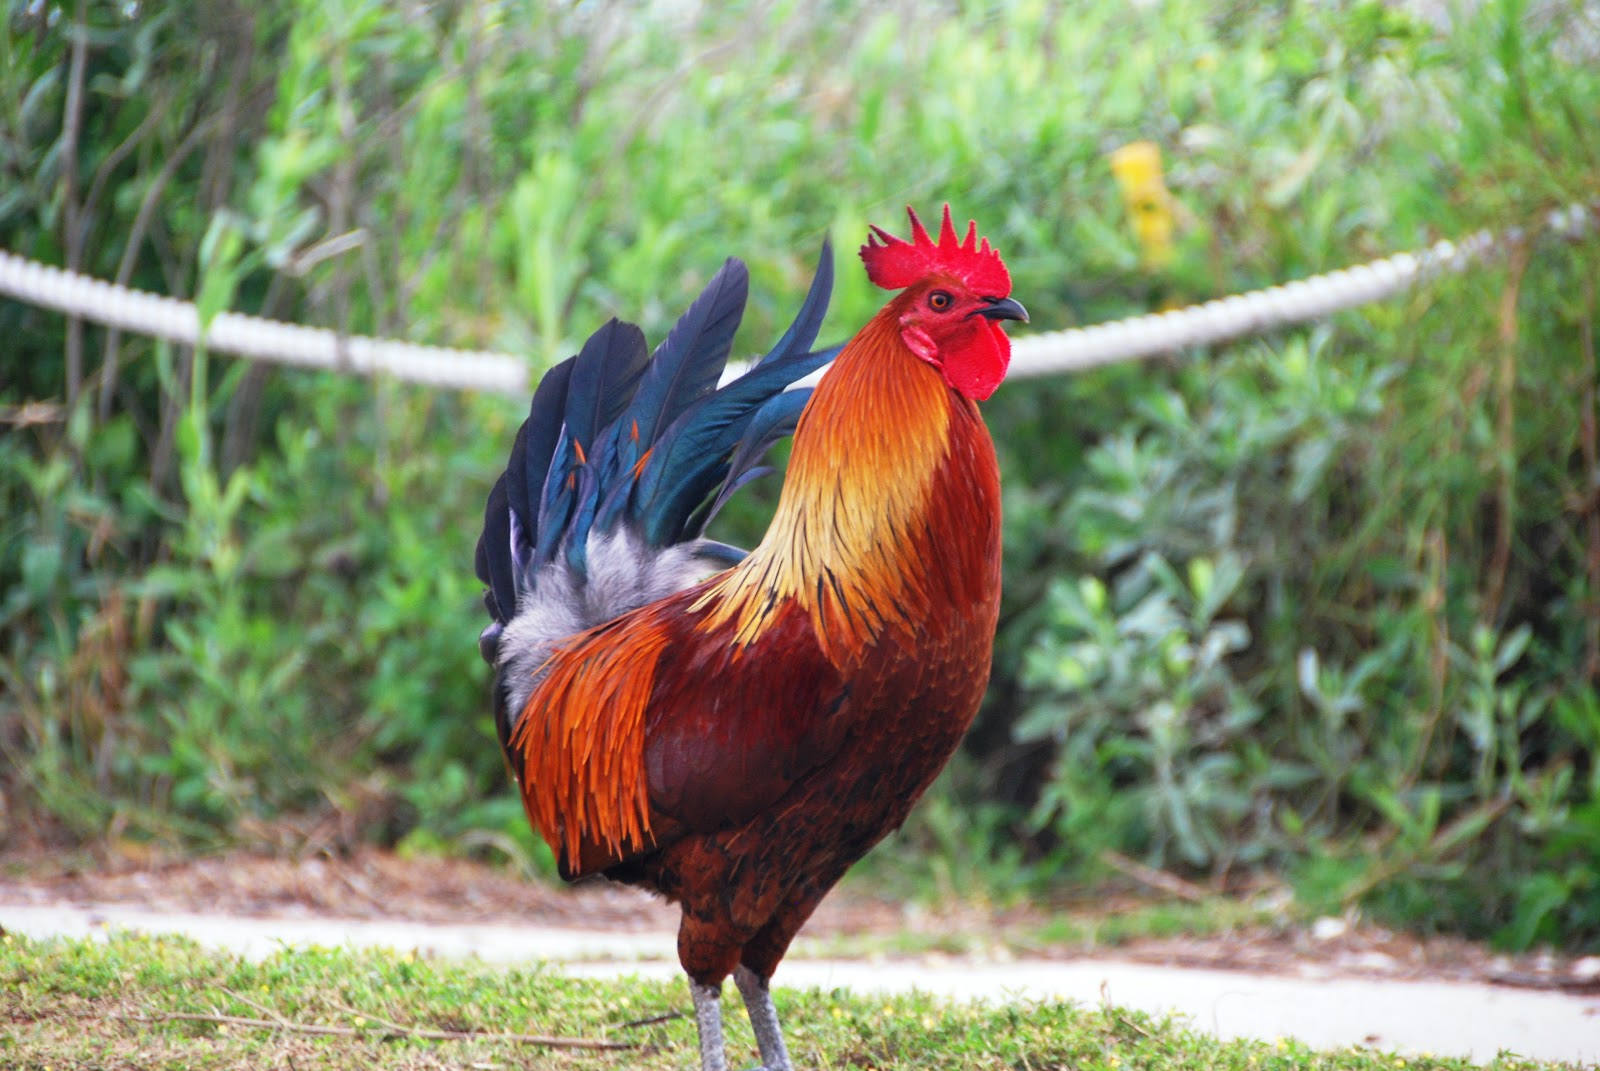
And for anyone wondering, they still have flocks of wild chickens running about. Of course being the former chicken lady I am, I chased them about for a few good shots. Enjoy!
For any of you who haven't been in recent years, it's more or less the same. Just more developed (like everywhere else in the world). The island now boasts more incoming and outgoing flights, a large shopping center, more hotels and inns, more eateries, more, more, more. But the general laid back vibe is still present, and the sun is still shining bright, and the sunsets are still just as amazing. And you can still find at the local watering hole a few kids who moved down to the island in hopes of stepping away from real life and never left.
Not waiting to be bombarded by the annoying hotel crowd, I opted for a quiet stay at a local B&B: the Atlantis House. What a pleasant surprise! A locally owned and family run small B&B located close to the beach and within easy walking/biking distance of the main drag, the Atlantis House was a fantastic stay.
The property had two beautiful suites, both with in-room jacuzzi tubs, free bike rentals, a stellar patio to sit and enjoy a mellow island moment, and I was fed some of the best baklava and key lime pie of my life. If you are heading to Key West, STAY HERE. You can send me a postcard later in thanks.
And being the foodie fanatic I am, I ate my way around the island. One of my first stops: Lupita's. Filling, simple, delicious, Lupita's was a wonderful tucked away spot for some traditional Mexican food and cokes. This was the perfect place to go for an inexpensive feast that was easy on the wallet. Their salsa was muy delicioso.
Another spot I sampled: Banana Cafe. This establishment is on the main tourist drag, had a lot of hype about it's awesome breakfast (especially eggs benedict), and was recommended through a few foodie sites. Honestly, I wasn't blown away. The food was good, but not great and not worth the hype in my book. They managed to get my order wrong, but promptly fixed it, and just didn't seem to have their act together as there was a lot of staff discussions going on (constantly). A few orders at nearby tables also appeared to be wrong and it took a long while to get our dirty plates cleared (pet peeve in my book) as well as our check. Would I go back? Eh, probably not. But you should try it for their crepes - they are also supposed to be amazing. And the view from the upstairs patio is wonderful for people watching.
The shining gem of all the food sampled: Santiago's Bodega. I had sworn I had taken a ton of pictures of the many (many!) tapas plates I sampled, alas I was too busy eating as I don't have a single one. I tried their beef carpaccio, prosciutto wrapped goat cheese stuffed figs, beef short ribs, pork skewers (heavenly), patatas bravas, and more. Everything was outstanding. What I also managed to find was a bottle of some of the best tasting wine of my life. Along with this, I met wonderful patrons at the tables next to me as I devoured some of the best tapas to pass my lips. Santiago's was outrageously good! And well worth every penny spent. I would return in a heartbeat and likely eat a meal there once a day on my next Key West journey.
And last but not least, I made a point to swing into Havana 1 for a little authentic Cuban food. After a delicious meal of roast pork which melted in my mouth and some of the best plantains ever, the owners treated me to some homemade flan (complete with a chocolate sauce rose). Needless to say I was blown away by the food!
And for anyone wondering, they still have flocks of wild chickens running about. Of course being the former chicken lady I am, I chased them about for a few good shots. Enjoy!
Thursday, December 13, 2012
Local Eats: Fig Bistro
Fig is a gem. One of the first places I ever ate at in Asheville and outstandingly one of my favorites, the restaurant always delivers quality food and a wonderful environment. Self proclaimed intimate neighborhood restaurant featuring casual interpretations of New American and French cuisine, Fig is an amazing place to grab a quick bite, business lunch, spiffy dinner or even just appetizers at their lovely bar. I've spent a good deal of time at their bar enjoying meals and can attest to its awesomeness.
Not too long ago, the local paper did a write up on Fig and did an interview with the lovely owner, Traci. In it she spoke of her desire to present French inspired dishes in an unhurried atmosphere borrowing from a Paris brasserie. In my opinion, she is spot on the mark! Next time you are in the mood for a delicious bottle of vino or maybe a sampling of delicately flavored mussels or even a pork schnitzel, head to Fig. Make sure to save room for dessert! And their delicious ice wine...mmm, I love dessert wines. Enjoy!
Monday, December 10, 2012
Boston Cream Pie Cupcakes
To bake or not to bake? That is the question most of us avid bakers face, especially during the holidays. When it became apparent I would be the lead baker for Thanksgiving dinner, I quickly set about trying to find stellar, deliciously tasting desserts to serve my family. Poking around the intronets I discovered a lovely blog called A Bit of Bees Knees and an awesome recipe for morphing boston cream pie into cupcakes. Who doesn't love cupcakes AND boston cream pie?!
Along with a basic pumpkin pie, I decided to go the boston cream pie cupcake route for our Thanksgiving Day dessert spread and am definitely happy I did. These cupcakes were amazing! Everyone who sampled one wanted more. The filling made these cupcakes extra special and the flavor was spot on.
My only change included using instant vanilla pudding as opposed to cook and serve, which didn't appear to make any big difference. Using this recipe and the vanilla pudding box instructions for pie filling as guides, I was easily able to assemble the pie portion of these cupcakes (and shovel a little pudding into my mouth in the process). If you are questioning what to make to accompany your next holiday dinner, try these babies out. Buon cibo! Buone Feste!
Boston Cream Pie Cupcakes
Borrowed from: A Bit of Bees Knees
Cupcakes
2 1/2 cups all-purpose flour
3/4 tsp baking soda
1/2 tsp each baking powder and salt
3/4 cup (1 1/2 sticks) unsalted butter, softened
1 1/4 cups sugar
3 large eggs
2 tsp vanilla extract
1 cup buttermilk
Filling
1 package (3 oz) isntant vanilla pudding
1 1/4 cups milk
1/2 tsp vanilla extract
Chocolate Glaze
8 oz semisweet chocolate, chopped
1/3 cup each sugar and water
3 Tbsp unsalted butter, softened
Heat oven to 350ºF. Line 18 muffin cups with paper liners.
In a bowl, whisk flour, baking soda, baking powder and salt until blended.
Beat butter and sugar in a large bowl with electric mixer until light and fluffy, about 2 minutes. Add eggs, one at a time, until well blended. Beat in vanilla extract.
With mixer on low speed, alternately beat in flour mixture and buttermilk, beginning and ending with flour mixture, until just blended.
Spoon about 1/4 cup batter into each muffin cup. Bake 18 to 20 minutes until wooden pick inserted in center comes out clean. Cool 5 minutes; remove from pan to wire rack to cool completely.
Prepare pudding as package directs, using 1 1/4 cups milk and the pie instructions on the box for guidance; cover surface directly with plastic wrap and refrigerate until cold.
Place chocolate, sugar and water in a small saucepan over low heat. Cook, stirring, until melted and smooth, about 3 minutes. Remove from heat; stir in butter until it melts and mixture is smooth. Let cool.
Slice off top of cupcakes to come to top of paper liners. Spread cut surface with about 1 Tbsp filling. Top with cupcake top. Spoon about 1 Tbsp glaze onto top center of each, easing it over top. Set in the fridge for half an hour to let the chocolate set up.
Along with a basic pumpkin pie, I decided to go the boston cream pie cupcake route for our Thanksgiving Day dessert spread and am definitely happy I did. These cupcakes were amazing! Everyone who sampled one wanted more. The filling made these cupcakes extra special and the flavor was spot on.
My only change included using instant vanilla pudding as opposed to cook and serve, which didn't appear to make any big difference. Using this recipe and the vanilla pudding box instructions for pie filling as guides, I was easily able to assemble the pie portion of these cupcakes (and shovel a little pudding into my mouth in the process). If you are questioning what to make to accompany your next holiday dinner, try these babies out. Buon cibo! Buone Feste!
Boston Cream Pie Cupcakes
Borrowed from: A Bit of Bees Knees
Cupcakes
Filling
Chocolate Glaze
Heat oven to 350ºF. Line 18 muffin cups with paper liners.
In a bowl, whisk flour, baking soda, baking powder and salt until blended.
Beat butter and sugar in a large bowl with electric mixer until light and fluffy, about 2 minutes. Add eggs, one at a time, until well blended. Beat in vanilla extract.
With mixer on low speed, alternately beat in flour mixture and buttermilk, beginning and ending with flour mixture, until just blended.
Spoon about 1/4 cup batter into each muffin cup. Bake 18 to 20 minutes until wooden pick inserted in center comes out clean. Cool 5 minutes; remove from pan to wire rack to cool completely.
Prepare pudding as package directs, using 1 1/4 cups milk and the pie instructions on the box for guidance; cover surface directly with plastic wrap and refrigerate until cold.
Place chocolate, sugar and water in a small saucepan over low heat. Cook, stirring, until melted and smooth, about 3 minutes. Remove from heat; stir in butter until it melts and mixture is smooth. Let cool.
Slice off top of cupcakes to come to top of paper liners. Spread cut surface with about 1 Tbsp filling. Top with cupcake top. Spoon about 1 Tbsp glaze onto top center of each, easing it over top. Set in the fridge for half an hour to let the chocolate set up.
Subscribe to:
Posts (Atom)