Sunday, January 30, 2011

Coconut Muffins


Another breakfast muffin, another tool for bribery. Can't blame a girl for using her talents, right?


After the layered coconut cake from a few weeks ago, I had extra shredded coconut leftover and needed to get some baking therapy action going. Hence my newest breakfast nosh was born - Coconut Muffins.


The recipe is similar to an old one from Mr. Breakfast.com, however I did some modifying (can't help myself). I reduced the baking powder, added some baking soda, swapped the oil for applesauce, used coconut milk in place of regular milk, added vanilla and coconut extracts, and some sugar. Wow, I guess I did change a lot of the original recipe. They ended up great! Not too sweet, very tasty, exactly what you want in a breakfast muffin. Enjoy!

Coconut Muffins
Adapted from: Mr Breakfast.com
  • 1 cup shredded coconut (sweetened is preferred)
  • 2 cups flour
  • 1 tsp baking powder
  • 1/2 tsp baking soda 
  • 1/4 cup brown sugar
  • 1/8 cup white sugar
  • 1/2 tsp salt
  • 1 egg
  • 1 cup lite coconut milk
  • 1 tsp vanilla extract
  • 1 tsp coconut extract
  • 1/3 cup applesauce  
In a medium bowl, sift together dry ingredients except coconut (flour, baking powder, baking soda, sugar, and salt). Set aside.

In a small bowl, combine together egg, milk and applesauce. Add vanilla and coconut extracts and mix. Then add egg mixture at once to dry ingredients.

Stirring mixture only until the dry ingredients are moistened; add shredded coconut. The batter will be lumpy.

Spoon into lightly greased mini muffin tin, filling each cup half to two-thirds full. Bake in a 350 degree oven for 11-13 minutes, or until golden brown. If using regular or jumbo size muffin tins, bake for a few minutes longer.

Sunday, January 23, 2011

Sunday Brunch


Sundays are the bomb, hands down. Especially if you fill your Sundays with good company and great food. Lucky for me, that is exactly how I spent this Sunday.


A handful of us came together to create an exquisite menu - Avocado Fries, Tiramisu Pancakes, Oven Potatoes with ample servings of mimosas. Not bad, eh?


All of the dishes were amazing. The Tiramisu Pancakes were deliciously evil, especially with the marscapone cream. The Avocado Fries were the first to disappear, always a sign of a very tasty dish. And the Oven Potatoes were a wonderful savory compliment to the bouquet of flavors. Try one recipe, try them all...but make sure you are very hungry if you attempt this exact menu. ;) Enjoy!

Tiramisu Pancakes
Adapted from: The Ivory Hut

For the pancakes:
  • 2 cups all-purpose flour
  • 2 tablespoons sugar
  • 2 tablespoons cocoa powder, slightly rounded, sifted
  • 2 teaspoons baking powder
  • 1/2 teaspoon baking soda
  • a generous pinch of salt
  • 1 cup almond milk
  • 1/2 cup lite coconut milk
  • 1/2 cups sour cream
  • 3 large eggs
  • 4 tablespoons butter, melted
  • 2 teaspoons vanilla
  • 2 tablespoons instant coffee
For the glaze:
  • 1/4 cup maple syrup
  • 3 tablespoons softened butter
  • 2 tablespoons coffee liqueur

For the cream:
  • 4 oz. mascarpone cheese
  • 1 cup whipping cream
  • 2 tablespoons coffee liqueur
  • 2 tablespoons maple syrup

Start by preparing the cream and the glaze. For the cream, beat all ingredients together and whip until you have soft peaks. Set aside in the refrigerator. (Tip: this cream tastes amazing, and is what really makes these pancakes. If you like generous amounts of cream on your pancakes, you might want to make a double portion.) The glaze is optional, but very, very (and I mean very) good. Simply combine the ingredients well. Set aside.

In a medium bowl, combine the flour, sugar, cocoa powder, baking powder, baking soda, and salt. Make sure the cocoa powder is well sifted, so that it will dissolve evenly.

In a separate bowl, combine both milks and sour cream until smooth (it helps to slowly dilute the sour cream with the milk while whisking, which reduces the chances of clumps). Add the instant coffee powder and mix well until dissolved. Whisk in the eggs, melted butter, and vanilla. Add the wet mixture to the dry ingredients, mixing gently until you have a slightly lumpy batter but without any large clumps of flour. If batter is a little runny, add a tablespoon or two of flour. I like to transfer my batter to a measuring cup or something else with a spout, for easier cooking.

Let the batter sit while you preheat your griddle. When griddle is hot, drop batter in portions desired (1/4 cup for regular-sized pancakes) onto the greased griddle. When bubbles come up and edges look cooked, gently flip to cook the other side. Once pancakes are cooked, transfer to a plate. Spread a small amount of the maple glaze over the top of the pancake so it soaks in while still hot. Continue with the remaining batter until done.

To serve, dollop a generous amount of the cream in between layers of pancakes. Top with more cream, and then top with shaved chocolate, or a light dusting of sifted cocoa powder.

Serve with extra cream and/or glaze on the side for dipping. A bonus: these pancakes taste amazing even when cold.


Avocado Fries 
Adapted from: Circle B Kitchen 

  • Canola oil for frying   
  • 1/4 cup flour 
  • 1 tsp kosher salt 
  • 2 large eggs, beaten to blend 
  • 1 1/4 cups panko (Japanese bread crumbs) 
  • 2 firm-ripe medium avocados, pitted, peeled, and sliced into 1/2-in. wedges
  • Sea salt for finishing
Preheat oven to 200°. In a medium saucepan, heat 1 1/2 in. oil until it registers 375° on a deep-fry thermometer.

Meanwhile, mix flour with 1/2 tsp. salt in a shallow plate. Put eggs and panko in separate shallow plates.

Sprinkle the avocado slices with the remaining ½ tsp salt.  Dip each slice in flour, shaking off excess. Dip in egg, then panko to coat. Set on 2 plates in a single layer.

Fry a quarter of avocado slices at a time until deep golden, 30 to 60 seconds. Transfer slices to a plate lined with paper towels. Keep warm in oven while cooking remaining avocados. Sprinkle with sea salt to finish. 


** PS - the Oven Potato recipe is forthcoming, and it's well worth the wait! **

Saturday, January 22, 2011

Quinoa Salad & More Hiking


Hiking is keeping me going this gray, rainy winter season. Seriously, the blues would have likely taken me long ago if not for these hikes. If you haven't spent at least an hour outdoors in the past week, I urge you to do so... like now. Go. Get off the computer.


We did the South Willamette Trail this week, and while not as awesome as last week's Larison Trail, it was still great. More like a cloud rain forest, with the misty woods and showers passing over.


And now on to the food! A week or two ago I made a long-time favorite and staple - Quinoa Salad.  Great for vegetarians and vegans, provides lots of protein, and it is always a wonderful summer dish addition.


The recipe is super simple, and can be modified in a lot of ways. Enjoy!

Quinoa Salad
  • 1/4 cup red onion, diced 
  • 1 1/2 cup quinoa, cooked and cooled (I make mine with vegetable stock and/or Braggs for flavor)
  • 1-2 tomatoes, seeded and diced 
  • 1/4 cup cilantro or italian parsley 
  • 1 cucumber, seeded and diced 
  • juice of 1 lime 
  • 3-4 tbsp lite vinaigrette dressing
  • splash of peanut oil
  • splash of rice wine vinegar
Cook the quinoa as directed, and remember you can change the flavor of the quinoa by using vegetable stock, Braggs, or something flavorful. Set aside and let cool.

In a large bowl, add tomatoes, cilantro, and cucumbers together with the cooked quinoa. Toss until well incorporated. If you wish to add herbs, now is the time to do so.

In a small bowl, whisk together the lime juice, vinaigrette dressing, peanut oil, and rice wine vinegar. Add to the quinoa and toss until everything is well coated. Salt and pepper to taste. Serve immediately or let it sit in the fridge for a few hours for fuller flavor.

Variations include using medetarrian cheeses and vegetables, tweaking the dressing for flavor preference, or making the flavors more asian inspired.

Friday, January 14, 2011

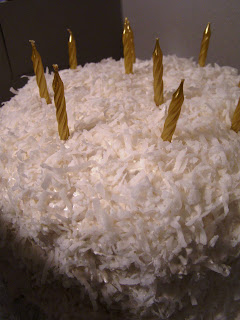
Layered Coconut Cake


This is a layered coconut cake. It rocks. Seriously.


This cake was my first attempt at a layered cake. Before this I stayed away from them due to their intimidation factor.


However it was a pretty special lady's birthday and this was what the sweet tooth fairy had in mind.


What can I say? This cake took a little effort, but was well worth it. My changes - not much, actually. I didn't pour the filling over the top layer, but now that I realize letting it sit for a few days is key for flavor, I will definitely do this the next time I make this recipe. I also added a dash of almond extract. Other than that it is nearly the same as the original. Enjoy!! Make sure you have lots of friends around to help you eat this bad boy.

Layered Coconut Cake
Adapted from: Jamie's Coconut Cake

Cake:

  • Basic 1-2-3-4 Cake but substitute 1 cup canned, unsweetened coconut milk for regular milk, recipe follows

Filling:

  • 3/4 cup sugar
  • 1 cup sour cream
  • 4 tablespoons milk
  • 1/2 cup flaked, sweetened coconut

Frosting:

  • 1 recipe 7-minute Frosting
  • Flaked, sweetened coconut, for sprinkling
Follow directions for Basic 1-2-3-4 Cake, substituting coconut milk for regular milk. While cake is baking, prepare filling. Stir together sugar, sour cream, milk, and coconut in a bowl until well blended. Remove cake layers from oven and allow cake to remain in pans as you prepare to stack and fill. Remove first layer and invert onto cake plate. Using the wrong end of a wooden spoon, poke holes approximately 1-inch apart until entire cake has been poked. Spread 1/3 of filling mixture on cake layer. Top with second layer, repeat process. Top with last layer and repeat process again. (As I stack layers together I stick them with toothpicks to prevent cake from shifting).

Prepare 7-Minute Frosting. Frost top and sides of cake. Sprinkle top and sides of cakes with additional coconut.

Basic 1-2-3-4 Cake:

  • 1 cup (2 sticks) butter, at room temperature
  • 2 cups sugar
  • 4 eggs
  • 3 cups sifted self-rising flour
  • 1 cup milk
  • 1 teaspoon pure vanilla extract
  • 1 teaspoon almond extract 
Preheat oven to 350 degrees F.

Grease and flour 3 (9-inch) cake pans. Using an electric mixer, cream butter until fluffy. Add sugar and continue to cream well for 6 to 8 minutes. Add eggs, 1 at a time, beating well after each addition. Add flour and milk alternately to creamed mixture, beginning and ending with flour. Add vanilla and almond extracts and continue to beat until just mixed. Divide batter equally among prepared pans. Level batter in each pan by holding pan 3 or 4 inches above counter, then dropping it flat onto counter. Do this several times to release air bubbles and assure you of a more level cake. Bake for 25 to 30 minutes or until done. Cool in pans 5 to 10 minutes. Invert cakes onto cooling racks. Cool completely and spread cake layers with your favorite frosting to make a 3-layer cake.

7-Minute Frosting:

  • 1 1/2 cups sugar
  • 1/4 teaspoon cream of tartar or 1 tablespoon white corn syrup
  • 1/8 teaspoon salt
  • 1/3 cup water
  • 2 egg whites
  • 1 1/2 teaspoons pure vanilla extract
Place sugar, cream of tartar or corn syrup, salt, water, and egg whites in the top of a double boiler. Beat with a handheld electric mixer for 1 minute. Place pan over boiling water, being sure that boiling water does not touch the bottom of the top pan. (If this happens, it could cause your frosting to become grainy). Beat constantly on high speed with electric mixer for 7 minutes. Beat in vanilla.

Tuesday, January 11, 2011

11 Layer Dip - Go Ducks!


Well, we didn't have the finish I was hoping for last night. However, the Ducks took us to a whole new level overall for the season. Way to go team! Needless to say the town is a bit somber today in mood. For those Eugenians out there - doesn't this guy look like Frog???


A friend was kind enough to let us overrun his house and have a game day party (thanks buddy, you know who you are). Besides the kickass Watershed IPA keg from another local brewery, Oakshire, we definitely had enough food to last us most of the night.


My contribution - 11 layer dip! Oh my gosh, was it good.


These are the team spirit color deviled eggs my buddy did! Obviously, I fell off the cleanse band wagon.


You know who inspired me to make this my game dish? None other than the witty (hot) man himself, Nathan Fillion. He is one circle away from my social circle, oh so close! Like any good tweet stalker, I follow his tweet feed. And if you are also fan, you would have read his tweets about his own 7 layer dip recipe. Of course I added a few layers, always have to make it Panda-style! If ever so lucky, one day I'll share some of my dip with Nathan. Food that is! Get you're mind out of the gutter, pervs. ;)


11 Layer Dip

  • 1 can of Black Beans (you can refry these yourself at home with a little taco seasoning and chopped onion (1/4 of one)) or 1 can of Refried Beans
  • 1-2 tomatoes, diced
  • 1 small can of Green Chilies
  • Guacamole (homemade tastes best)
  • 1 container or Salsa (homemade tastes best, although store bought fresh works too)
  • 1 container of low-fat Sour Cream
  • 1 package of Shredded Cheese (Mexican style works) 
  • 1/2 bunch of Cilantro, chopped
  • 1 bunch of Green Onions, chopped
  • 1 small can of Black Olives, sliced 
  • 1 small can of JalapeƱos, sliced (jarred kind works too)
  • 1 packet of Taco Seasoning 
To make refried beans out of a can of black beans - over low-medium heat, add the can of beans to a small sauce pan. Mix in 2 tsp. of taco seasoning, 1/4 chopping onion, and cook for about  20 mins. As you continue to cook, remember to stir often and mash down the beans (wooden spoon works). Taste test and add more flavoring as needed. Remove from heat and spread over the bottom of a casserole dish. Let this cool before adding any other layers (unless you want to melt the cheese, see below).

If using pre-made refried beans, spread over the bottom of a casserole dish.

Next add the layer of diced tomatoes. If the tomatoes are too moist, de-seed prior to dicing.

Next add the small can of diced chilies. I sometimes also use part of this can to make the guacamole and/or refried beans.

Sprinkle a little bit of taco seasoning on top of these layers.

Next add the guacamole in one thick layer. Using the back of a spoon helps to spread the guacamole around.

Use most of the container of salsa to make the next layer.

Follow this up with the sour cream. The easiest way is to put little dollops all over the last layer and gently spread with the back of a spoon.

Sprinkle a tad bit more taco seasoning on top of this layer.

Next add the cheese. Go as crazy as you like. If you are serving the dish immediately and don't have time to cool the beans in step 1, then feel free to add the cheese on top of the beans to melt it.

Next add the chopped cilantro in one green layer.

Follow up with chopped green onions in another layer.

Sprinkle the black olives over everything in the next layer.

Add jalapeƱos as your personal taste allows (lots in my case) to the top of the dish. And presto - 11 layers!

Friday, January 7, 2011

Warm Artichoke Spinach Dip


It is definitely still winter in Oregon! A beautiful hike today proved true of this. Just check out the snow! You can barely see the trail.


Just had to throw in the waterfall shot. :)

Day 6 of my cleanse and I want food. All the time. Lots of it, the greasier the better. Seriously, what the hell was I thinking doing this thing? Note to anyone out there contemplating a cleanse - make sure you are in the right mindset to tackle something like this; and if you are a super active person, watch your calorie intake. Enough said!


Last month for the first round of the Beer Olympics, I made a batch of one of my most favorite appetizers - Artichoke Spinach Dip! Nom, nom, nom. Wow, my stomach is growling now... This is a perfect comfort food dish for winter. If I weren't on this stupid cleanse right now, I would be shoveling this into my mouth by the chip load!


It's a fairly easy recipe, with plenty of room to make modifications. I usually make mine the night before, let things stew, then pop it in the oven to serve. It's chalk full of cheese and other deliciously bad things for you, however you can opt for the low fat route by buying low fat mayo and cheeses. At this point though, I would go full steam!


After mixing all the ingredients together, you throw it in a baking dish.


Add more cheese, and bake until bubbly and scrumptious! Notice you don't see a fully cooked picture of this dish? Yeah, that's my fault. I was so eager to get it over to the Beer Olympics that I forgot to take a final shot! Bad Panda. However, I am sure you can imagine this slightly browned, crispy on top, and chalk full of cheese bubbles. Enjoy!

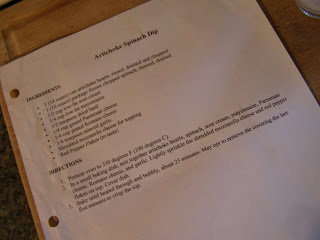
Artichoke Spinach Dip
  • 1-10 ounce package of frozen spinach, thawed and drained
  • 1-14 ounce can of artichoke hearts, rinsed, drained, and chopped
  • 1/2 cup of mayo, low-fat to reduce calories if desired 
  • 1/4 cup of sour cream, low-fat to reduce calories if desired 
  • 1 tsp. dried basil
  • 1 tsp. dried oregano
  • 1 tsp. dried thyme 
  • 1/4 cup grated parmesan cheese (more if you like extra cheesy dip)
  • 1/4 cup grated romano cheese (more if you like extra cheesy dip)
  • 1-3 cloves of minced or pressed garlic
  • Shredded mozzarella for topping
  • Red pepper flakes for topping 

1. Pre-heat oven to 350 degrees F.
2. In a baking dish with a lid, mix together everything except the last two ingredients. Lightly sprinkle the mozzarella and red pepper flakes over the top. Lightly salt and pepper to taste (remember the cheeses are fairly salty in flavor).
3. Bake until heated through and bubbly, usually 25-30 minutes. Remove the covering the last 5-10 minutes of baking to crisp the top. Cool for a few minutes and eat while warm! Tortilla chips or crackers good well with this dish.

Tuesday, January 4, 2011

Breakfast Smoothie


Day 3 of the cleanse and I am feeling a little...well, frumpy. Tired, can feel the detoxing happening throughout my body, and the newest kicker is my insanely vivid dreaming. Last night I had a dream within a dream, which was more surreal than I can express (yes, it was weird like the movie Inception). Am going to blame it on the cleanse.


While the last few days I have had freshly made juice for breakfast, today I opted for a smoothie due to the large amount of cardio and physical activity I planned on doing. Using Joy the Baker's Kale Spinach and Pear Smoothie recipe as a starting point, I tweaked the recipe a bit and omitted the honey to stay in line with my cleanse. I do have to say, drinking a full glass of my breakfast smoothie was quite filling! 


Plus a little shout out to one of my favorite local Eugene breweries, Ninkasi. If I can't drink their tasty brew while on the cleanse, at least I can drink out of one of their pint glasses. :)

Breakfast Smoothie
Adapted from: Kale Spinach and Pear Smoothie
  • Half a ripe avocado
  • Half a pear 
  • A handful of fresh spinach
  • One large leaf of chard (any kind)
  • One banana (you can freeze the banana if you like a colder style smoothie)
  • 1 to 1 1/2 cups of cold almond milk (hazelnut or rice work too) 

Chop of the fruit into large pieces to make the blending easier. Add all items to your blender and process until smooth and bright green. Pour into a glass and enjoy!

Monday, January 3, 2011

New Year, New Cleanse


Happy New Year! Wishing all of you a wonderfully prosperous 2011, filled with many tasty treats. :)

Once a year I usually do a sugar/alcohol cleanse, taking a break from two things that beat up my body but I adore. This year, being a nice transition into the year of the Rabbit, I figured I should base it around healing the body and mind. To start things off right, I devised a 21-day cleanse to fill much of January with. It is based upon the Clean Program by Dr. Alejandro Junger, obviously modified a bit for being a vegetarian.

So far I am on day 2 and in the throws of the initial detox period. One more day and I am over the initial hump. If I can hang a few more weeks, I'm sure my body will love me for it.

In the meantime, expect some smoothie and fresh juice recipes on here. A good one a friend turned me onto just today is from one of my favorite bloggers Joy the Baker. Just today she put up a recipe for a Kale Spinach and Pear Smoothie. Take out the honey and it is perfectly in line with the cleanse I am on!

Interested in just what my cleanse entails? Here is the gist:

Length: 21 days, or 14 days if desiring a lesser cleanse

Based Upon: The Clean Program (modified for vegetarians)

Recipes: The Clean Program recipes I didn't buy into the whole pre-made package deal (too expensive), and am doing all the juicing and smoothie making from organic ingredients. Also am making my own soup for lunches.

Logic: A basic pseudo fast-cleanse of processed foods, sugars, fats, and all the other junk we put in our bodies will benefit our overall health, specifically aiding digestion, allergies, skin color, 5-15 lbs weight loss (if followed correctly), illnesses, insomnia, etc. think of it as purging and resetting the body’s systems.

Breakfast: Freshly made fruit/veggie juice or non-dairy smoothie

Lunch: Salad, fresh fruits and veggies, chicken (I opt out), freshwater fish (I opt out), soup

Dinner: Freshly made fruit/veggie juice or non-dairy smoothie

Snacks: Nuts (although not peanuts), fresh fruit or veggies.

No-No Items:
  • Dairy, cheese, milk, etc.
  • Eggs
  • Alcohol
  • Wheat, corn, barley, spelt, kamut, rye, couscous, oats
  • Soy or soybean products
  • Meat, especially read meat
  • Raw fish, pork, beef, veal, sausage, cold cuts, canned meats, hot dogs, shellfish
  • Sugar, refined sugar, white or brown sugars, honey, maple syrup, high-fructose corn syrup, evaporated cane juice
  • Salt, added salt
  • Butter, margarine, shortening, processed oils, salad dressings, mayonnaise, spreads
  • Coffee, caffeinated beverages, soda pop, soft drinks
  • Chocolate
  • Oranges, orange juice, grapefruit, strawberries, grapes, and bananas
  • Corn, creamed vegetables, tomatoes, potatoes, eggplants, pepper
It sounds rough, but so far it hasn't been. This isn't a full fledged fast, so I am still ingesting low amounts of calories. In the meantime, a few dishes I made during the end of 2010 should tide you all over until my baking craze resumes in 19 days!