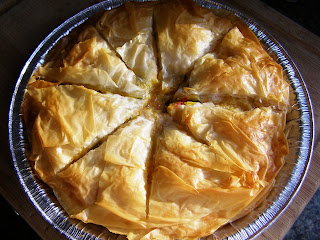
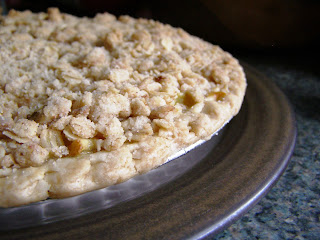
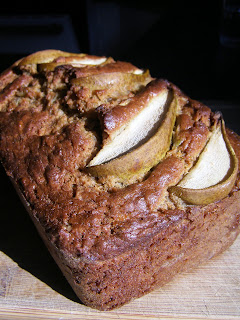
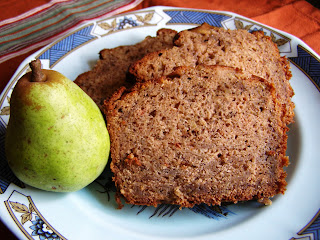
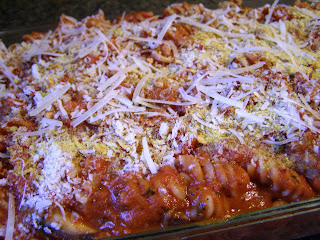
And just in case you are wondering what I have been up to, here are a few shots to clue you in. Enjoy!
Wednesday, December 28, 2011
A Brief Departure
It's been a bit quiet around here for a spell. Don't fret! Things should return to some semblance of normalcy in the next short while. Life came knocking on my door and butted its head into my business, reminding me of a few things I needed to focus on. However, I shall have some sort of triumphant return post-NYE, so stay tuned!
And just in case you are wondering what I have been up to, here are a few shots to clue you in. Enjoy!
And just in case you are wondering what I have been up to, here are a few shots to clue you in. Enjoy!
Tuesday, November 22, 2011
Spiced Green Tomato Cupcakes
Hands down, these babies have been the most popular baked good I've made all year. As with most of the tasty recipes, I had to gift away as many cupcakes as possible to prevent devouring them all. I think I stopped myself after I had consumed six cupcakes in a row...
Now, I highly encourage all of you to grab those last few green tomatoes laying around the house or yard and make a batch of these for the upcoming holiday. As you sit there, licking your sticky fingers, smiling at the delicious goodness of these cupcakes...you can thank me. Enjoy!
Inspired by: Spiced Green Tomato Cake
- 2 1/2 cups pureed green tomatoes
- 1/2 cup butter
- 1/4 teaspoon salt
- 2 cups white sugar
- 2 eggs
- 2 cups all-purpose flour
- 1 teaspoon ground cinnamon
- 1/2 teaspoon ground nutmeg
- 1/4 teaspoon allspice
- 1/4 teaspoon ginger
- 1/2 teaspoon vanilla extract
- 1/2 teaspoon almond extract
- 1 teaspoon baking soda
- 1/4 teaspoon salt
- 1/2 cup raisins
- 1/2 cup chopped walnuts
Preheat the over to 350 degrees F. Line a cupcake pan with cupcake liners.
Cream together butter and sugar for 2-3 minutes in a mixing bowl, until well incorporated. Add eggs and beat until creamy. Next add the vanilla and almond extracts and mix. Finally, add the pureed tomato mixture and mix.
Sift together flour, spices, baking soda, and 1/4 teaspoon salt in a separate bowl. Then add the dry ingredients to the creamed mixture, followed by the raisins and walnuts.
Pour the batter evenly into the cupcake pan, using 2/3 of a cookie scooper often works well.
Bake for 15 minutes or until a toothpick inserted into the cake comes out clean. Allow to completely cool before frosting.
Low Fat Cream Cheese Frosting
Inspired by: Cream Cheese Frosting Recipe
- 1/2 cup butter, room temperature
- 1 8-oz package of low fat cream cheese, room temperature
- 2-3 cups powdered sugar
- 1 teaspoon vanilla extract
With an electric mixer, mix the butter and cream cheese together, about 3 minutes on medium speed until very smooth. Scrape down the sides and bottom of the bowl to ensure even mixing.
Add the vanilla extract and mix. Slowly add the powdered sugar. Keep adding until you get to desired sweetness and thickness.
Either spread on with a blunt knife or spatula, or spoon into a piping bag to decorate each cupcake. Refrigerate any leftover frosting for up to 4 days. It tastes especially delicious eaten by the spoon.
Thursday, November 17, 2011
Mediterranean Vegetable Pie
Mediterranean Vegetable Pie
Adapted from: Mediterranean Roasted Vegetable Pie
- 2-3 small to medium green tomatoes, halved and cored
- 1 large red tomato, halved and cored
- 2 yellow beets, diced
- 1 medium-sized zucchini, cut into 1/3-inch dice
- 1 medium-size onion, halved and thinly sliced
- 1/4 cup + 1 T olive oil
- Salt and freshly-ground black pepper
- 3 garlic cloves, minced
- 1 T each, chopped fresh parsley, basil, and oregano leaves
- 4 ounces feta cheese, crumbled (about 1 cup)
- 1 T rice wine vinegar
- 4 T butter, melted
- 8 sheets of phyllo dough (about 14x18 inches each), defrosted if frozen
- Salt and pepper to taste
Arrange tomatoes, cut-side down, in a single layer in the baking dish. Roast for about 30 minutes, until tomatoes are tender and begin to turn brown in spots.
Meanwhile, toss the beets, zucchini, and onion in a large bowl with 1/4 cup of the heat-safe oil. Season lightly with salt and pepper. Arrange in a shallow layer in the other prepared pan. (No need to wash the bowl. You'll use it again later.)
Place the roasting pan in the oven with the tomatoes. Roast for about 30 minutes until vegetables are tender and beginning to turn brown, stirring every 10 minutes or so. If both pans don't fit in the oven together, place the tomatoes on the middle rack and the vegetables on the bottom rack. Rotate them a couple of times for even roasting. When you remove all of the vegetables from the oven, reduce the temperature to 375 degrees F.
When the tomatoes are cool enough to handle, pull the skins off. This should be easy, but don't worry about stubborn parts that stick. Combine the peeled tomatoes and roasted vegetables in the large bowl you used earlier. Add the garlic and fresh herbs. Toss to mix well, then gently mix in the cheese. Season lightly withe salt and pepper (to taste), adding the vinegar, if needed, to balance the sweetness of the tomatoes. DO AHEAD: You can make the filling up to two days ahead. Just cover and chill until it's needed.
Combine butter and remaining 1 T of oil. Brush some of the butter on the bottom of a deep 9 or 10 inch pie plate. Center 1 sheet of phyllo in the pie plate, allowing the edges to hang over. Brush the phyllo with a bit of butter. Top with 4 more sheets of phyllo, brushing each with butter before adding the next. (Arrange the sheets so there is excess hanging all around the pie plate instead of in just two places.) Spoon the vegetable and cheese mixture into the pie plate. Fold the edges over, brushing them with a little butter. Layer the remaining 3 sheets of phyllo over the top, brushing each layer with butter and either tucking the edges in the side of the plate or folding them toward the middle.
With a sharp, serrated knife, cut the pie into wedges through the top sheets only. Don't cut all the way through the bottom layer. Bake for 30 minutes, until crust is golden brown. (Maybe a few minutes longer if the filling has been refrigerated.)
Let the pie rest for 5-10 minutes before slicing and serving.
Sunday, November 6, 2011
MyLivingDays
Many of you wonder what I do with my time besides bake. Funny thing is, I actually do quite a lot that doesn't involve an oven and a taste tester. One of my most recent endeavors has been exploring other areas of writing beyond the foodie realm, specifically submitting work to share on MyLivingDays. A brilliant forum for sharing news, stories, lifestyle tips, foodie exploration, and just about anything else you can dream of, MyLivingDays has become a creative outlet of sorts for me. Easy to use, share, and comment, MyLivingDays coins itself a midlife magazine for those seeking to take a departure from other busy, confusing social media platforms. A close friend is one of the co-founders and has done me the wonderful service of reminding me that there is an entire world of stuff to write about, if I would simply put down the measuring cup for a while. We all have our vices, right?
Here are a couple pieces I recently contributed. Check their website frequently for updates as they are soon to launch a small suite of social tools. Feel free to join and contribute to the voice of the masses!
Family Trumps Oktoberfest
Fall Into Great Food
The Elephant Called Grief
Tips: Navigate Airports Like A Pro
Enjoy!!
Tuesday, November 1, 2011
Pear Panda Puffs
Pear Panda Puffs
Adapted from: Spiced Pear Phyllo Bundles
- 16 sheets frozen phyllo pastry, thawed overnight in the fridge
- 3/4 c melted butter
- 1/2 c sugar + more for sprinkling over the top
- 1 tsp cinnamon
- 1/2 tsp nutmeg (freshly grated is best)
- 1/4 tsp ginger
- 1/4 tsp allspice
- 4 large pears, cored, sliced & marinated for at least 1 hour in Frangelico
- 1 egg + 2 tsp water (beaten together for eggwash)
Core and slice pears, then marinate them in a small bath of Frangelico for at least an hour. The longer the better!
Mix together spices and 1/2 cup sugar, then set aside.
Brush a sheet of phyllo pastry with butter and sprinkle the entire surface with about 1 tsp sugar. Top with a second sheet of phyllo pastry. Brush half this sheet with butter and sprinkle with about ½ tsp sugar. Fold the sheet in half to make about a 9x12 inch rectangle which will now have 4 layers of phyllo pastry. Place a pear half in the center of the shorter side of the rectangle and spoon about 2 tsp of the sugar and spice mixture over the pear half. Fold the two longest sides of the pastry to meet at the center of the sheet covering the pear half. Roll up the pear in the phyllo, leaving the seam on the bottom of the pastry covered pear.
Repeat for the other pear halves.
Brush the tops of the pastries with the egg wash and sprinkle the tops with turbinado sugar if desired.
Place the pastries, seam side down on a parchment covered cookie sheet. Bake at 350 degrees F for 20-25 minutes until the pastry is evenly golden brown. Makes around 8 bundles.
Labels:
comfort food,
dessert,
easy cooking,
pastry,
pears
Saturday, October 29, 2011
Monday, October 24, 2011
Happy Renewal
I've been a bit lousy with posting of late, but I have a good excuse. It was my birthday! Yippee! For anyone who knows me, this meant I had another reason to celebrate. And that is exactly what I did this past week! Ladies and gentlemen, please welcome the 2011 Awkward Adult Prom crew. I heart these guys, in a big way.
Thursday, October 13, 2011
Another Foodie Fest & Pesto Polenta Bites
Yippee! Another foodie fest! Oh the joy in having friends gather together for an afternoon of good eats, tasty spirits, and one foodgasm after another.
Our very sweet hostess, Samba. My ongoing doggie crush. Ssh, don't tell her. It might inflate her adorable ego.
This time around we went with a Mediterranean theme, encouraging any recipe that may come from a Mediterranean country. The turnout of dishes was amazing! Homemade pesto, homemade hummus, cheese and fruit spread, tzatziki, beef gyros, kalamata olive poundcake, a roasted vegetable pie, falafel, dolmas, and many more recipes.
We even had a beer flyer with (some) beers from Mediterranean origins. Plus ouzo, of course. There is always room for ouzo!
One of the world's best pound cakes right here!
One of my offerings this foodie fest were pesto polenta bites. Easy as can be, flavorful to boot with the pesto, and open for a lot of variety in morphing the recipe. Next time you are at the store and see a tube of pre-made polenta, I encourage you to pick some up and try out a recipe. It may surprise you, enjoy!
Pesto Polenta Bites
- About 1/4 cup purchased or homemade pesto
- 24 rounds purchased cooked polenta (sliced from tube works)
- 1 cup Parmesan cheese, shredded
- Herbs
Place polenta rounds slightly apart on an oiled baking sheet. Spread pesto over the top of each polenta slice, sprinkle with cheese and herbs, and bake for 400 degrees F until the cheese is melted and beginning to brown (usually 10-13 minutes). Let the polenta rounds cool for a few minutes, then transfer with a spatula and serve!
Labels:
appetizers,
comfort food,
foodie fest,
italian,
pesto,
polenta
Thursday, October 6, 2011
Creamy Pear Pie
Creamy Pear Pie
Adapted From: Pear Sour Cream Pie
Pie
- 1 (9 inch) pie crust pastry
- 1/2 cup white sugar
- 1 cup vanilla non-fat yogurt
- 1/4 cup all-purpose flour
- 1 egg, beaten
- 1 tsp vanilla extract
- 1/4 tsp salt
- 4 large pears - peeled, cored and sliced
- 2/3 cup all-purpose flour
- 1/3 cup white sugar
- 5 tbsp butter, melted
- 2/3 cup rolled oats
- 1 tsp. cinnamon
- 1/2 tsp nutmeg
- 1/2 tsp ginger
Preheat an oven to 350 degrees F (175 degrees C). Take pre-made pastry out of the freezer.
Combine 1/2 cup sugar, sour cream, 1/4 cup flour, egg, vanilla, and salt in a bowl until blended. Fold in the pears. Pour the mixture into the pie plate and bake the pie for 15 minutes.
While the pie is baking, prepare the topping: mix the 2/3 cup flour, 1/3 cup sugar, spices, melted butter, and rolled oats together in a bowl.
Remove the pie from the oven and sprinkle with the crumble topping. Return the pie to the oven and bake until the filling is set and the crust is brown, about 20 minutes more. Allow to cool and set before serving.
Sunday, October 2, 2011
Farmer's Market
So why the Farmer's Market for a pick-me-up? Well, a lot of it has to do with the ebb and flow of the place. I enjoy people watching, local produce, and any reason to snap off a few shots. These reasons combined with the fresh aromas of whatever is freshly roasting/baking/being assembled are plenty enough for me to spend a few lazy hours wandering around the stalls.
The last time I was at my local Farmer's Market I discovered these beautiful pink pearl mushrooms. Delicious!
Prices are reasonable, if not cheaper than the local grocery store, plus the produce is typically straight from field to table (win!).
My goal is to stock up on everything while I can as our Farmer's Market only runs on a seasonal basis, harvest already upon us. For instance, these lovely melons.
If I'm lucky, I'll have a few moments to put in some fall starts to keep the garden going as long as possible. If nothing else, it'll give my feathered ladies another treat, little spoiled fatties!
Saturday, September 24, 2011
Zucchini Cookies with Citrus Icing
Gigantic, right?
My changes to the recipe included adding almond extract and tweaking the icing glaze by adding some orange juice to it. I would definitely refer to these as muffin top cookies due to their fluffy, near-muffin like appearance and taste.
And again, my taste testers gave these high scores for flavor, uniqueness, and the ability to eat several in a row without realizing it. Enjoy!
Zucchini Cookies with Citrus Icing
Adapted from: My Baking Addiction
Cookies
- 1/2 cup unsalted butter, room temperature
- 1 cup sugar
- 1 egg
- 1 cup finely shredded zucchini
- 1 tsp finely grated lemon zest
- 1 tsp vanilla extract
- 1/2 tsp almond extract
- 2 cups all-purpose flour
- 1 tsp baking soda
- 1 tsp baking powder
- 1 tsp ground cinnamon
- 1/2 tsp salt
- 1/2 cup raisins
Citrus Icing
- 1 cup powdered sugar, sifted
- 1 1/2 tbsp lemon juice
- 1 tbsp orange juice
- 1/4 tsp pure vanilla extract
Preheat oven to 375 degrees F.
Spray a baking sheet with with nonstick cooking spray and line with parchment paper.
In the bowl of a stand mixer fitted with the
paddle attachment or with a hand mixer, beat the butter and sugar until light
and fluffy, about 2 minutes. Beat in egg, zucchini, lemon zest, vanilla and almond extracts.
In a medium bowl mix together the flour, baking
soda, baking powder, cinnamon and salt. Stir flour mixture into wet ingredients
until just combined. Fold in raisins.
Use a medium cookie
scoop (1 ½ tablespoons) to drop dough into the center of each
whoopee pie well or simply drop them directly onto the prepared cookie sheet.
If you are using a cookie sheet, be sure to leave a few inches between each
cookie.
Bake in preheated oven for 8-10 minutes or
until lightly browned. Remove to wire racks to cool.
Make the icing by mixing together the powdered
sugar, lemon juice, orange juice, and vanilla extract. Drizzle the icing over
cooled cookies.
Thursday, September 15, 2011
Spiced Pear Banana Bread
Last weekend I escaped. No, not from jail. From the monotony of my daily life. And headed for the coast.
Ah yes, the Oregon coast. How I adore thee!
Windy beaches free of crowds, an amazing local aquarium, local breweries - what's not to like?
Of course I had to bring some baked goods for the road. The pear tree out back finally got the message this year and has been producing like crazy! Even after gifting away 10 lbs. of pears, I still found myself with an abundance to use up and fast. So as a treat to myself, I brought along a freshly baked loaf of Spiced Pear Banana Bread.
Try not to drool on the keyboard, which you would be doing if computers had the ability to release scents (omg, did this recipe smell great during the baking process).
Using the pears from the yard, the eggs from our feathered ladies, and a few bananas I had stowed away in the freezer, this was a fairly easy recipe. I adapted it from Banana Bread Recipes, using shredded pears in place of mashed ones and adding almond extract (my secret weapon).
It did brown a bit around the edges, but made for some amazing flavor. This recipe is definitely a keeper! Enjoy!
Spiced Pear Banana Bread
Adapted from: Banana Bread Recipes
- 2 cups flour
- 1 tsp baking soda
- 1 tsp cinnamon
- 1/2 tsp ginger
- 1/4 tsp nutmeg
- 2 mashed bananas
- 2 cups shredded pears
- 1/2 cup white sugar
- 1/2 cup brown sugar
- 1/2 cup butter, room temperature
- 1/4 cup non-fat vanilla yogurt
- 2 eggs
- 1 tsp vanilla extract
- 1/2 tsp almond extract
Preheat the oven to 350F. Grease a loaf pan and coat with flour to prevent sticking.
In a medium mixing bowl, mix together the flour, baking soda, cinnamon, ginger and nutmeg.
In another mixing bowl, cream together the white sugar, brown sugar and butter. Scrape down the sides of the bowl and make sure everything is well incorporated.
Mash the bananas in another bowl. Shred the pears into another small bowl.
Stir the banana into the sugar and butter mixture. Then add in the eggs, vanilla and almond extracts, stirring well. Next stir in the yogurt, again mixing well. And finally add the shredded pears.
Slowly pour the wet mixture into the dry mixture, stirring constantly. Mix really throughly until everything is perfectly blended together.
Spoon the mixture into your prepared loaf pan. You can place a few slices of pear on top and sprinkle with a little brown sugar for decoration if you desire.
Place the loaf pan in the center of preheated oven and bake on 350F for 1 hour to an 1 hour 20 mins. Cooking times may vary, so check if the bread is done by inserting a toothpick or knife into the middle of the loaf. As soon as that toothpick comes out clean, take the loaf out! You don't want to overcook it.
Allow the banana bread to cool in the loaf pan for about 10-20 minutes. The cooling is important because the loaf will solidify fully as it cools. Then remove it from the pan and let stand for another 20 minutes or so until it has cooled. Slice and enjoy!
Thursday, September 8, 2011
Foodie Ode to J
I'm sure Mr. Emerson didn't quite mean this quote in the same context I am referring to, however I bet he wouldn't mind much as it is for a good cause. As luck would have it (and I thank my lucky stars each day for such luck), I've had the delightful pleasure of being close friends with my pal, J, for over a decade now. As the years have passed, life has thrown us together in so many unusual and comical situations that I consider her my sister. You know, the kind that you actually want to have around during the holidays. From hiking out of a desert with one shared flip-flop between us to blindly moving to the NW with each other to spending every birthday together for more years than I can count, our adventures never cease to amaze me. She is one of the greatest people I have ever encountered in all of my days.
Now I'm sure you are asking why I'm blathering on about my friend-crush. As life would have it, J is heading out on a walkabout of sorts. To contemplate her navel and find new discoveries. Three cheers for anyone who has the guts to do that! Needless to say I cannot join her on this sort of journey and for the first time in 11 or so years, we will no longer reside in the same great state together. I feel like I am losing my left arm while happily encouraging it to travel away, strange as that sounds. I'll sure miss J while she is wandering around the other side!
First up, cupcakes & muffins! J has sampled quite a few of my creations in her day, however these have been a few of her favs:
And she always loved my bread...
And of course a few more of her favorite dishes...
If my luck holds out, I'll be cooking again for her soon enough and our crazy adventures will continue onto the next chapter. Sending much love, happy thoughts and good vibes with J on her upcoming journey!
Subscribe to:
Comments (Atom)


