Showing posts with label cookies. Show all posts

Sunday, December 22, 2013

Annual Cookies Trays

Blink, and a month passes by. Or at least that is my excuse. Last I knew it was Thanksgiving, and boom - now it's nearly Christmas. That old adage that time flies when you get old is 100% true. Hell, I would say they padded it a bit because I think time is vanishing. I have more things to do than I have fingers and toes to count and keep track of them all!
In an effort to try and be timely, I made my Holiday Cookie Trays a little early this year. And then forgot to post about them before my vacation (whoops). Bad Panda. Maybe I will get on board with being timely next year...or maybe I shouldn't hold my breath.
Now I could have listed out each and every recipe, like I usually do, but time is of the essence these days and I opted for the link-friendly approach. A few of these recipes are repeats from prior years' holiday trays and a few are newbies. I encourage any and all feedback on how folks liked the selected cookies for 2013, as this will help the cookie boxes improve in years to come. This year's line-up:
By and large, the Piggy Print cookies are a favorite of my taste-testers. As are the popcorn cookies and basil lime cookies. The crisps, balls, and rods are time-saving, easy recipes (good space fillers), but need to ensure they stay in airtight containers or else they will get stale (same for the popcorn cookies). Next year's ideas - homemade extracts and/or syrups, maybe the return of a brittle (?), and as always - more cookies.

Happy holidays and enjoy!


Tuesday, October 15, 2013

Basil Lime Cookies

I don't know about you, but every so often I need a pick me up. A heart warming, happy feeling, good time pick me up. The kind that leaves you smiling and dreamy eyed, recalling good moments of your life. Sometimes this pick me up comes in the form of a sunny day, a snuggle session with Bert the Cat, or even an impromptu car ride through the woods. And occasionally I turn to a new recipe to brighten my spirits. Most recently I turned to these lovely babies - Basil Lime Cookies. Now before you starting judging how odd a cookie would taste with basil AND lime in the ingredients list, I implore you to take a bite out of one of these. You can thank me later. I made a batch of these for my new dentist's office and hot damn, did they love me for it. That's winning in my book!
Mmmmm, cookies that defy the laws of nature. My favorite! The most common remark from taste testers: surprisingly refreshing, and highly addictive. Score! Cookies that leave you wanting more, again I consider this a success. It's an easy recipe, with simple ingredients, and may even make an appearance on the 2013 cookie tray spread (wow, the holiday season is creeping up fast!).
And in other news, my photography side project is slowly taking shape. Feel free to swing by the blog and/or the facebook page to check out what's been in my viewfinder of late. Happy baking!!

Basil Lime Cookies
Borrowed from: Big Fat Baker
  • 1 stick unsalted butter at room temperature
  • 3/4 cup plus 1 tbsp sugar
  • 1 egg
  • 1/2 tsp vanilla
  • 1/4 tsp almond extract
  • Zest of 1 lime
  • 3 tbsp very finely chopped fresh basil leaves (I used a wee bit more here)
  • 1 3/4 cup flour
  • 1/2 tsp baking soda
  • 1/2 tsp salt

Directions:
Pre-heat the oven to 375 degrees Fahrenheit and line the cookie sheets with a silicone mat or parchment paper.

In a stand mixer (or hand-held mixer) cream together the butter and sugars until light and fluffy.

Mix in the egg, vanilla, zest, and basil. Mix together until fully combined.

In a separate bowl sift together the flour, baking soda, and salt. Then mix into the butter mixture until combined.

Roll 1 tbsp of dough to make a little sphere. Repeat with remaining dough. Place about 1 inch apart on the cookie sheets.

Bake 8 to 12 minutes, depending on the size of your cookies/oven. Allow to cool on a cooling rack for a few minutes then watch how fast they disappear! 

Saturday, March 2, 2013

Chocolate Chip Cookies Stat!

Someone close to me recently had a procedure. Nothing too grand, although anything that involves a doctor's office and a scalpel is big in my book. His procedure went splendidly and he was ordered to spend a few days of down time vegging out on the sofa, not moving much, contemplating his navel. If there is one thing I am extremely gifted at, besides baking (not to toot my own horn too much), it's caregiving and looking after someone who is convalescing. Panda le Chef to the rescue!
Requested by the sick one - chocolate chip cookies. Now, if you have been following me for a while you'll likely know that I've already covered baking chocolate chip cookies from nearly every angle possible. However thanks to the world wide web and the overall love of baking out there, I have more recipes to inspire me than I have days left on this earth. After some online hunting, I decided to try Anna Olson's recipe from Clockwork Lemon. One of the major differences in this recipe from others I have tried is the addition of cornstarch. I've never used cornstarch much in any cookie recipe, but all is fair in the baking world so I figured I'd try it out. I added my secret ingredient, almond extract, but retained most of the original recipe. Mmmm, cookies.
The end results = stellar! Nice almost cake-like cookies yet with the traditional chocolate chip cookie flavor. The outside was ever so crisp with the inside of each cookie soft and gooey. The sick one gave it a thumbs up in between cleaning the cookie crumbs from his shirt. Enjoy!

Another Chocolate Chip Cookie
Borrowed from: Clockwork Lemon

  • 1/2 cup unsalted butter, at room temp
  • 1/2 cup packed light brown sugar
  • 1/4 cup white sugar
  • 1 egg, at room temp
  • 1 tsp vanilla extract
  • 1 tsp almond extract
  • 1 1/4 cups flour
  • 2 tbsp cornstarch
  • 1/2 tsp baking soda 
  • 1/2 tsp salt
  • 1 cup semi-sweet chocolate chips (I like to freeze mine before use)

Preheat the oven to 350 F degrees. Line two baking trays with parchment paper.

Cream the butter, brown sugar, and white sugar together until fluffy (usually 3-5 minutes). Beat in the egg and then the extracts.

In a separate bowl, stir the flour, cornstarch, baking soda, and salt.

Add the flour mixture to the butter mixture and stir until evenly blended.

Drop the dough by tablespoonfuls onto the prepared baking trays, ensuring to leave an inch or so in between each cookie.

Bake for about 10 minutes, or until the cookies are golden brown. Let the cookies cool on the tray for 5 minutes and then transfer them to a rack to cool completely. Makes about 2 dozen. Store in an airtight container.

Saturday, October 13, 2012

Bringing It Back: Oatmeal Chocolate Chip Cookies

Guess what's nearly here?? No, not Christmas or the holidays. No, I'm talking about cookie season. Yay! Just a few months away from my annual cookie tray extravaganza (i.e. baking as an endurance sport). Usually the annual cookie tray requires a few months of cookie tryouts, however this year has found me too busy for sample batches (work, living, instant family, etc.). Instead I am going to start this year's cookie tray with a good solid cookie from my baking arsenal - my Oatmeal Chocolate Chip Cookies.These babies are going to be making a comeback appearance, by popular demand. Their secret - the food processed oats that make these both chewy and crispy at once. Make sure to keep an eye on them when they are in the oven so as not to allow them to get too crispy. And stay tuned for more additions to the 2012 cookie trays!

Thursday, August 30, 2012

Popcorn Cookies

 
On some days, the urge to bake is overwhelming. Like an itch I just have to scratch. My mind will start to wander off into the baking world, daydreaming of new creations or recipes I have yet to try. Instead of focusing on whatever is at hand, I find myself off in cupcake and cookie la-la-land. Wow, if I don't sound like I just fell out of Willy Wonka & the Chocolate Factory...
A recent discovery - popcorn cookies! Oh, my, god. Salty, sweet, almost crunchy with delicious chocolate morsels. It's like the best kettle corn you have ever had, yet in cookie form. Watch out for the cookie dough when making these little gems, it's highly addictive!
Side note - take a guess as to why there are so few pictures of these cookies? We ate them, all.

Popcorn Cookies
Adapted from: Framed Cooks 
  • 1/2 cup butter, room temp
  • 1 cup sugar, white
  • 1 egg
  • 1 tsp. vanilla extract
  • 1 1/4 cups flour
  • 1/2 tsp. baking soda 
  • 3/4 tsp. salt
  • 2 cups popcorn, crushed down a little (take out any hard bits or kernels, and use movie butter style)
  • 1 cup dark chocolate morsels or chips (I used bittersweet) 
Preheat the oven to 350 F. Line a baking sheet with parchment paper.

Cream the butter for a minute or two, then add the sugar and combined until fluffy and pale (around 3-4 minutes). Add the egg next, then the vanilla, and combine.

In another bowl, mix together the flour, baking soda, and salt. Slowly add the dry mixture to the butter mixture. Don't forget to scrape the bowl!

Gently stir in the popcorn and chocolate chips. Scrape down the sides of the bowl to ensure everything is well incorporated.

Using a tablespoon, drop dollops of cookie dough onto the cookie sheet, spacing the cookies about 2" apart. Bake for 10-12 minutes or until lightly golden. Watch the cookies as they may darken up on the bottom more than expected.

Remove from the oven and cool on the cookie sheet for a few minutes. Transfer to a rack and cool completely. Try not to eat them all at once!

Saturday, September 24, 2011

Zucchini Cookies with Citrus Icing


Summer is just about over, which means it's time to harvest the last of the warm-weather crops. As always, I'm left with more zucchini than I know what to do with, which isn't necessarily a bad thing yet there is only so much zucchini bread a baker can make.


Gigantic, right?


So I recently made a plan to bake up some zucchini cookies, with inspiration from My Baking Addiction. The original recipe called for baking these in a whoopie pie pan (which I don't own), however I opted for a plain old baking sheet instead. The cookies turned out a bit thinner, but delicious nonetheless. It's all in the combination of tender cookie and delicious icing!


My changes to the recipe included adding almond extract and tweaking the icing glaze by adding some orange juice to it. I would definitely refer to these as muffin top cookies due to their fluffy, near-muffin like appearance and taste.


And again, my taste testers gave these high scores for flavor, uniqueness, and the ability to eat several in a row without realizing it. Enjoy!

Zucchini Cookies with Citrus Icing 
Adapted from: My Baking Addiction 
Cookies

  • 1/2 cup unsalted butter, room temperature
  • 1 cup sugar
  • 1 egg
  • 1 cup finely shredded zucchini
  • tsp finely grated lemon zest
  • tsp vanilla extract
  • 1/2 tsp almond extract
  • 2 cups all-purpose flour
  • tsp baking soda
  • tsp baking powder
  • tsp ground cinnamon
  • 1/2 tsp salt
  • 1/2 cup raisins

Citrus Icing
  • 1 cup powdered sugar, sifted
  • 1 1/2 tbsp lemon juice
  • 1 tbsp orange juice
  • 1/4 tsp pure vanilla extract

Preheat oven to 375 degrees F. Spray a baking sheet with with nonstick cooking spray and line with parchment paper.

In the bowl of a stand mixer fitted with the paddle attachment or with a hand mixer, beat the butter and sugar until light and fluffy, about 2 minutes. Beat in egg, zucchini, lemon zest, vanilla and almond extracts.

In a medium bowl mix together the flour, baking soda, baking powder, cinnamon and salt. Stir flour mixture into wet ingredients until just combined. Fold in raisins.

Use a medium cookie scoop (1 ½ tablespoons) to drop dough into the center of each whoopee pie well or simply drop them directly onto the prepared cookie sheet. If you are using a cookie sheet, be sure to leave a few inches between each cookie.

Bake in preheated oven for 8-10 minutes or until lightly browned. Remove to wire racks to cool.

Make the icing by mixing together the powdered sugar, lemon juice, orange juice, and vanilla extract. Drizzle the icing over cooled cookies.


Monday, July 18, 2011

Oatmeal Chocolate Chip Cookies


One can never have too many chocolate chip cookie recipes, at least not in my book. And this is definitely a good one to add to your collection! This recipe is a good mix of chewy yet chocolaty, delicious yet satisfying. Isn't that apparent by the happiness seen on my face as I shove this cookie in my mouth? Yes, I am a total ham if it means getting a few laughs.


This recipe was discovered over at Bake or Break and is a goody to keep in the recipe box. My changes included adding almond extract, using my farm fresh eggs, trading out the chocolate bar for actual chocolate chips, and omitting the nuts this time around. The trick to the amazing chewiness? Blending the oats in a food processor first! Seriously, try it. The results are both surprising and tasty. Enjoy!

Oatmeal Chocolate Chip Cookies
Adapted From: Bake or Break 

  • 1 cup butter, softened
  • 1 cup granulated sugar
  • 1 cup firmly packed light brown sugar
  • 2 large eggs
  • 1 tsp vanilla extract
  • 1/2 tsp almond extract 
  • 2 cups all-purpose flour
  • 1 tsp baking powder
  • 1 tsp baking soda
  • 1/2 teaspoon salt
  • 2 1/2 cups uncooked regular oats
  • 1 1/2 cups semisweet chocolate chips
  • 1 cup chocolate chips 

Preheat oven to 375°.
Beat butter at medium speed in a heavy-duty mixer until creamy. This can take up to 3 or 4 minutes. Make sure to scrape down the edges of the bowl in between. Gradually add sugars and beat well. Add eggs, vanilla and almond extracts, beating well.
In a separate bowl, combine flour, baking powder, bakings soda, and salt. Gradually add to butter mixture and beat well.
Process oats in a food processor until finely ground. Add to butter mixture and beat well. Stir in chocolates.
Drop cookies by tablespoonfuls onto ungreased baking sheets, lined with parchment paper. Bake for 8-10 minutes or until lightly browned. Cool slightly on baking sheets. Then, remove to wire racks to cool completely.

Friday, December 17, 2010

A Tale of Two Cookies


Everyone has their favorite chocolate chip recipe. And everyone has an opinion about the others that fall to the wayside in comparison to their favorite. Personally, I think my Outrageous Chocolate Chip recipe is the bomb, but I'll offer to listen to yours in all fairness.


Another baking opportunity presented itself last week, much to my happy surprise, with the request for jumbo chocolate chip cookies. I hemmed and hawed about what type of chocolate chip cookies to make and deliver, finally deciding upon doing half of the order my famous Outrageous Chocolate Chip recipe (adapted from this Outrageous Chocolate Chip Cookie recipe) and another Jumbo Chewy Chocolate Chip recipe I discovered from Cooking On The Side. Both worked out splendidly, with everyone enjoying both varieties. My changes included adding almond extract to both recipes, adding walnuts and almond butter to my Outrageous Chocolate Chip recipe, and using more brown sugar in place of white sugar whenever possible (makes for better tasting cookies). And of course to make my Outrageous Chocolate Chip recipe, I doubled the recipe and made the spoonfuls of dough nearly 1/4 cup in size when putting them on the pan to bake.


In the end, the beauty is in the eye of the beholder. Or baker, I guess. Enjoy!

Amanda's Outrageous Chocolate Chip Cookies
Adapted from: Outrageous Chocolate Chip Cookies recipe
*double the recipe if making jumbo cookies*
  • 1/2 cup butter
  • 1/3 cup white sugar
  • 1/2 cup packed brown sugar
  • 1/2 cup almond butter
  • 1/2 teaspoon vanilla extract
  • 1/2 teaspoon almond extract 
  • 1 egg
  • 1 cup all-purpose flour
  • 1 teaspoon baking soda
  • 1/4 teaspoon salt
  • 1/2 cup rolled oats
  • 1 cup semisweet chocolate chips
  • 3/4 cup chopped walnuts

Preheat oven to 350 degrees F.

In a medium bowl, cream together the butter, white sugar and brown sugar until smooth. Make sure to blend until light and fluffy (a key to making a good cookie). Stir in the almond butter, vanilla extract, almond extract and egg until well blended. Combine the flour, baking soda and salt; stir into the batter just until moistened. Mix in the oats, walnuts, and chocolate chips until evenly distributed. For jumbo cookies drop, about 1/4 cup of batter on to lightly greased cookie sheets. For normal sized cookies, drop by the tablespoon full.

Bake for 12 to 15 minutes in the preheated oven for jumbo cookies (or 10-12 minutes for normal sized ones), until the edges start to brown. Cool on cookie sheets for about 5 minutes before transferring to wire racks to cool completely.


Traditional Jumbo Chocolate Chip Cookies
Adapted from: Chewy Jumbo Chocolate Chip Cookies recipe 
  • 4 1/4 cups all-purpose flour
  • 1 teaspoon baking powder
  • 1 teaspoon baking soda
  • 1/2 teaspoon salt
  • 1 1/2 cups unsalted butter
  • 1 1/4 cups white sugar
  • 1 1/4 cups firmly packed brown sugar
  • 2 eggs
  • 1 tablespoon vanilla
  • 1 teaspoon almond extract 
  • 1 (12-ounce) package (2 cups) semi-sweet chocolate chunks or chocolate chips

Heat oven to 375°F.

Combine flour, baking powder and baking soda in a medium bowl. Set aside.

Combine butter, sugar and brown sugar in a large bowl. Beat at medium speed, scraping the bowl often, until creamy. Make sure to blend until light and fluffy (a key to making a good cookie). Add eggs and vanilla and almond extracts. Continue beating, scraping bowl often, until well mixed. Reduce speed to low. Beat, gradually adding flour mixture, until well mixed. Stir in chocolate chunks.

Drop dough by 1/4 cupfuls, 2 inches apart, onto ungreased cookie sheets (tip: line the sheets with parchment, if you have some). Bake for 10 to 14 minutes or until light golden brown. (Do not overbake.) Let stand 1 to 2 minutes. Remove from cookie sheets.

Friday, December 3, 2010

You're Baking Me Crazy! Guest Bakers In the Kitchen


It's official. I have finally figured it out. How to have way too much fun, that is. Get a couple friends into the kitchen with you, add sugar and alcohol, then wait for the magic. And giggles. Smiles all around, all night long.


This week I invited two lovely, adorable ladies into the Panda le Chef kitchen for some holiday inspired baking.


As I recently picked up a pack of forest friends cookie cutters from Ikea, I opted to try out Martha Stewart's Sugar Cookies while my dear friend C opted for the Polar Opposites Cupcakes from What's New, Cupcake?


Ok, I may have pushed C a bit to do these ones. We thought they were easy. If you look closely you can see what time the clock in the picture reads...too late to be baking!


My dear friend H also came along and inspired these beautiful little piggies.


The Polar Opposites Cupcakes involved a glorified yellow cake mix batter (made with buttermilk) baked in typical cupcake liners. The frosting involved store-bought vanilla frosting with marshmallow fluff. Sweet as can be!


We used doughnut holes, sweetened coconut, frosted oat cereal, and mini marshmallows to decorate the bears. Next we used piped chocolate store-bought frosting to make the hands, feet, and face. C is amazing with decorating baked goods.


As for my Sugar Cookies, they were pretty straight forward. Some of the comments on Martha's page call for adding more sugar or making the cookies sweeter. I see no need in this if you are going to frost them. Actually, they needed little altering other than adding both vanilla and almond extracts. Very tasty. They make great lunch (as they have been mine for two days running).


Now go find a friend or two and start baking! Make sure to include some mimosas or hot cocoa with whiskey. Enjoy!

Sugar Cookies
From: Martha Stewart
  • 2 cups all-purpose flour, plus more for rolling
  • 1/2 teaspoon baking powder
  • 1/4 teaspoon salt
  • 1/2 cup (1 stick) unsalted butter, room temperature
  • 1 cup granulated sugar
  • 1 large egg
  • 1 teaspoon vanilla extract
  • 1 teaspoon almond extract
  • Assorted candies, sprinkles, or colored sugars, for decorating (optional)
In large bowl, whisk flour, baking powder, and salt. With an electric mixer, cream butter and sugar until light and fluffy. Beat in egg, almond and vanilla extracts. With mixer on low, gradually add flour mixture; beat until combined. Divide dough in half; flatten into disks. Wrap each in plastic; freeze until firm, at least 20 minutes, or place in a resealable plastic bag, and freeze up to 3 months (thaw in refrigerator overnight).

Preheat oven to 325 degrees. Line baking sheets with parchment. Remove one dough disk; let stand 5 to 10 minutes. Roll out 1/8 inch thick between two sheets of floured parchment, dusting dough with flour as needed.

Cut shapes with cookie cutters. Using a spatula, transfer to prepared baking sheets. (If dough gets soft, chill 10 minutes.) Reroll scraps; cut shapes. Repeat with remaining dough.

Bake, rotating halfway through, until edges are golden, 10 to 18 minutes (depending on size). Cool completely on wire racks. To ice cookies, spread with the back of a spoon. Let the icing harden, about 20 minutes. Decorate as desired.

Monday, October 11, 2010

Orange Marmalade Cookies with Orange Zest Icing


Last month I made my Wish List of recipes to bake in the near future and I have been slowly, but surely, making my way through the list. This week I attempted a batch of Orange Marmalade Cookies with Orange Zest Icing. Mmm...heaven melting in your mouth. Best visual I can give you here.


The recipe came from White On Rice Couple (cute blog) and honestly, couldn't have been easier. While there are a few steps to making these little sweet babies, none of them are hurdles. The basic cookie plus the icing are both amazingly easy recipes. And from the response of my taste testers (bowling team, friends at work, folks I am pawning these cookies off on), everyone votes to add them to the Xmas Cookie Tray this year! Yippee!

I didn't modify this recipe too much as I wanted to maintain the basic integrity of the recipe. Only changes included adding a little fresh orange and lemon zest to the batter and using whatever orange marmalade (Dundee) I had in the fridge plus another brand I happened to pick up at the store. I also only chilled the dough an hour, then let each sheet of cookies ready to be baked sit in the fridge for a few minutes before popping them in the oven.

Bake on, lovely folks. Roll up your sleeves, try to keep your fingers out of the icing (I sure as hell couldn't), and enjoy!

Orange Marmalade Cookies with fresh Orange Icing
Makes about 36 cookies.

Cookie Dough
  • 1/2 c unsalted Butter
  • 1 c White Sugar 
  • 2 lrg Eggs (as always I use farm fresh from my ladies) 
  • 1 c Seville Orange Marmalade (regular Orange Marmalade will work too-Seville Oranges will give a slight bitterness to cookie to offset icing sweetness)  
  • 3 c all-purpose Flour
  • 1/2 t Baking Soda
  • 1/2 t Sea Salt
Orange Icing
  • finely grated zest from 1 Orange
  • finely grated zest from 1/2 a Lemon
  • 1/4 c fresh squeezed Orange Juice
  • 1 t fresh squeezed Lemon Juice
  • 3 T unsalted Butter, melted
  • 1/8 t Sea Salt
  • 3 c Confectioners’ Sugar


Combine butter and sugar in a mixer bowl and beat with paddle attachment until light and fluffy.  Break eggs in a small bowl, whisk to break up, then incorporate into the butter/sugar mix. Mix in orange marmalade.


Sift together flour, baking soda, and sea salt.  Gently incorporate into wet mix until just combined. Cover bowl with plastic wrap and refrigerate until chilled (@ 1-2 hrs.)


While dough chills, make orange icing. Combine citrus zests, juices, melted butter and sea salt in a bowl. Whisk in confectioners’ sugar until well combined and smooth.  Cover and set aside. Preheat oven to 300° F. Line sheet pans with baking paper or silpats.


Using 2 teaspoons, drop walnut sized cookie dough balls onto prepared sheet pans, spaced about 3″ apart.  Bake for about 20 min. or until cookies are light brown.  Remove from oven, transfer to wire rack and allow to cool completely.


After cookies are completely cool, ice them with a small spatula or butter knife. Refrigerate to set the frosting.

Wednesday, June 9, 2010

Meyer Lemon Butter Cookies


Even the best of bakers have bad days in the kitchen, and I had one yesterday. My usual batch of breakfast muffins turned into squishy, overly moist globs instead of their typical deliciousness. Instead of happy, perky blueberry raspberry muffins I ended up with sticky sad muffins. I even managed to drop my kitchenaid mixer on my chest when trying to store it away (bruise to prove it as well). Some days, you just stay out of the kitchen until your baking mojo returns. And most gratefully my poor lame muffins were still tasty and thus eaten.


Thankfully, I had much better success with my Meyer Lemon Butter Cookies! I discovered the recipe from 
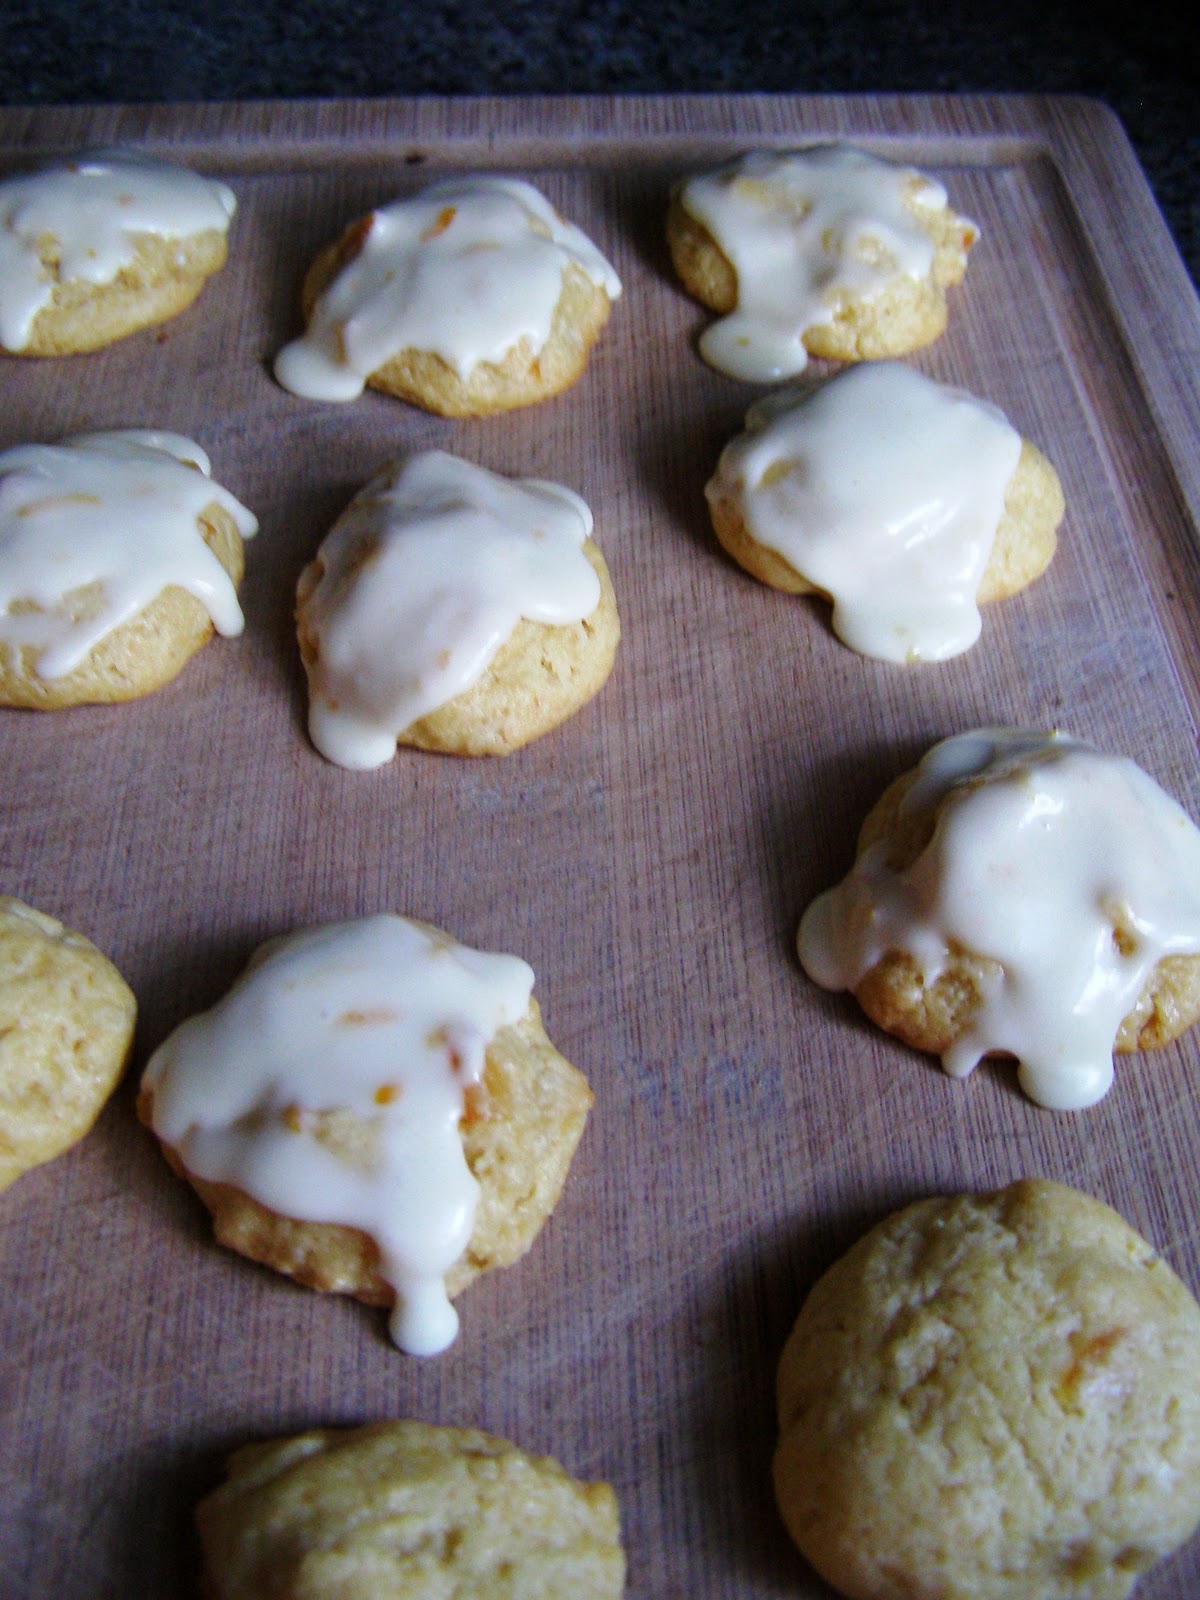
AlpineBerry.com when doing some searching for a lemon cookie recipe. Now please understand that while I greatly appreciate lemon flavored desserts, I am not a big lover of lemon goodies. Hence the meyer lemons! These little gems were light, refreshing and very easy to make. And a possible addition for my annual cookie trays.


The trick to the buttery goodness of this recipe is using powdered sugar in the baking mix as opposed to usual white granulated sugar. It makes for light, fluffy cookies that nearly melt in your mouth.


If you follow the recipe as directed, the last step before baking involves brushing the cooled dough log with egg yolk and then rolling in sugar. Yum!

ps - the other cookies in the photo are my Outrageous Chocolate Chip Cookies, recipe should be up shortly!

Sablés au Citron
(from Paris Sweets by Dorie Greenspan)
(makes 50 cookies)


8 ounces (2 sticks) unsalted butter, softened at room temp.
2/3 cup confectioners' sugar (measured then sifted)
2 large egg yolks (divided use: 1 for dough, 1 for coating)
pinch of salt
2 tsp vanilla extract
2-4 tsp finely grated lemon zest (to taste)
2 cups all purpose flour
approximately 1/2 cup granulated sugar (for coating)

In the bowl of a stand mixer, beat butter on medium speed until smooth, add the confectioners' sugar and beat until smooth. Beat in 1 egg yolk, followed by salt, vanilla and lemon zest.

On low speed, add the flour and mix just until flour is incorporated.

Turn dough out onto a counter, gather dough into a ball, divide in half, and wrap each piece in plastic wrap. Chill dough for 30 minutes in refrigerator.

Form each piece of dough into a log that is about 1 to 1 1/4 inches in diameter. (If the diameter is right, the length you end up with is fine. Mine are usually about 6 inches long.) Wrap logs in plastic wrap and chill dough for 2 hours in refrigerator. (Dough logs can be wrapped airtight and kept refrigerated for up to 3 days or stored in freezer for up to 1 month.)

Preheat oven to 350F. Line your baking sheets with parchment paper.

If you are coating your cookies with sugar, whisk the remaining egg yolk until it's smooth and liquid enough to use as a glaze. Spread granulated sugar out on a piece of waxed paper. One log at a time, unwrap your chilled dough log and brush lightly with the egg yolk. Roll the log in sugar, pressing gently to help the sugar stick.

Slice each log into rounds about 1/4 inch thick. Place on baking sheets, leaving about 1/2 inch between the cookies.

Bake at 350F for 12-14 minutes until they are set but not browned. (It's okay if the yolk-sugar edges brown slightly.) Transfer cookies to cooling rack.

Wednesday, December 16, 2009

Cookie Tray Recipes

As promised, here is the list, plus links, for the recipes for this year's Panda le Chef cookie trays. Please disregard the poor photography - I didn't have my nicer camera and instead used my small travel camera for most of the pics (while covered in flour and butter). Enjoy! 


Citrus-Drizzled Cranberry Oatmeal Cookies - These are it, folks. These are hands down the winner year after year. You can never go wrong with these. They are crack, sweet delicious crack! The cookies themselves are amazing, even without the citrus glaze. But the glaze makes them a whole new experience! And have fun with putting the drizzle on, let your artistic side out and play around.

Earl Grey Tea Cookies - A new addition this year, and a very unexpected surprise. I have quite a few friends who dislike sweets and after trying a few different options, I found this recipe to be very popular amongst them. The recipe calls for low-grade earl grey tea, however I found some AWESOME loose leaf earl grey tea in the bulk section of the local store. As always, I added a little splash of almond extract (a baker's secret weapon for yumminess).


Chocolate Almond Cherry Crisps - By far, the easiest of recipes and one I use every year.  Melt some white and chocolate chips, then mix with rice krispies, fruit and slivered almonds and let set. I used dried cranberries as they are usually cheaper and I like the tartness of them, although last year I used dried cherries and that was also delightfully good. Secret step - add a good sprinkle of sea salt on top while the chocolate is setting, results are outrageously good! The better the sea salt, the better the taste (I sometimes use smoked sea salt).

Lavender Tea Cookies - I adore these cookies. Oh how I love my lavender tea cookies! I skip the frosting glaze (too sweet for my tastes) and of course, add some almond extract. If you haven't discovered the world of baking with lavender, you are in for a treat! For the holiday trays, I made these into little star shapes for an extra festive touch.


Mini Popcorn Balls -  WARNING, highly addictive!! Oh my, I can't tell you how much popcorn goodness I ingested while making these. One popcorn ball for the cookie trays, one in my mouth. :) If you need to do a double or triple batch, ensure you have a large turkey/roasting pan. It makes all the difference!


Hazelnut Brittle - I modify the recipe by usually adding a wee bit more chopped nuts than called for. The recipe does not produce much so I always suggest doubling or tripling when making the brittle. Watch out for under cooking the sugar mixture on the stove; if you do not cook it until it is a beautiful golden brown, you will end up with hazelnut fudge of sorts. Which is what happened to me this year on the second batch! I used the leftover popcorn from the popcorn balls for my homemade Moose Munch.


Panda's Moose Munch - I ended up with the under cooked (hence sugary fudge) hazelnut brittle after doing my second batch. I also ended up with bits of yummy buttery popcorn goodness from the Popcorn Balls and extra cranberries. Instead of pitching all of these leftovers, I mixed them together and presto - Panda's Moose Munch was born!