Thursday, August 30, 2012

Popcorn Cookies

 
On some days, the urge to bake is overwhelming. Like an itch I just have to scratch. My mind will start to wander off into the baking world, daydreaming of new creations or recipes I have yet to try. Instead of focusing on whatever is at hand, I find myself off in cupcake and cookie la-la-land. Wow, if I don't sound like I just fell out of Willy Wonka & the Chocolate Factory...
A recent discovery - popcorn cookies! Oh, my, god. Salty, sweet, almost crunchy with delicious chocolate morsels. It's like the best kettle corn you have ever had, yet in cookie form. Watch out for the cookie dough when making these little gems, it's highly addictive!
Side note - take a guess as to why there are so few pictures of these cookies? We ate them, all.

Popcorn Cookies
Adapted from: Framed Cooks 
  • 1/2 cup butter, room temp
  • 1 cup sugar, white
  • 1 egg
  • 1 tsp. vanilla extract
  • 1 1/4 cups flour
  • 1/2 tsp. baking soda 
  • 3/4 tsp. salt
  • 2 cups popcorn, crushed down a little (take out any hard bits or kernels, and use movie butter style)
  • 1 cup dark chocolate morsels or chips (I used bittersweet) 
Preheat the oven to 350 F. Line a baking sheet with parchment paper.

Cream the butter for a minute or two, then add the sugar and combined until fluffy and pale (around 3-4 minutes). Add the egg next, then the vanilla, and combine.

In another bowl, mix together the flour, baking soda, and salt. Slowly add the dry mixture to the butter mixture. Don't forget to scrape the bowl!

Gently stir in the popcorn and chocolate chips. Scrape down the sides of the bowl to ensure everything is well incorporated.

Using a tablespoon, drop dollops of cookie dough onto the cookie sheet, spacing the cookies about 2" apart. Bake for 10-12 minutes or until lightly golden. Watch the cookies as they may darken up on the bottom more than expected.

Remove from the oven and cool on the cookie sheet for a few minutes. Transfer to a rack and cool completely. Try not to eat them all at once!

This is Not a Farewell

This post originally started a few months ago as a fond farewell...but damn if I just can't stop blogging about food. Plus the fact that several friends of mine recently began hounding me for my recipes. I'm a foodie; I have an addiction to sharing recipes with others. Blogging is my intervention.
And so a bunch of stuff has happened in my life since my past post (way, way back in December). I moved, I acquired a new family of sorts, I traded in my chickens for dogs, blah, blah, blah. I know you aren't here to hear about all of that, it's the food that keeps you coming back.
Intro the new and improved Panda le Chef site! Bigger and badder than ever, I've revamped a few things around the kitchen. I fell off my vegetarian bandwagon nearly a year ago and have to admit, I'm loving meat. So you will likely see a whole lot more of it around these parts.
I'm also doing tons more photography work, spending time trying to hone in on my skills and whatnot, so expect more pretty pictures. And from new perspectives (like the east coast).
Feedback is always welcome, as well as suggestions for what you all would like to see me bake, cook, or review during my travels.

Viva la foodie revolution!


Wednesday, December 28, 2011

A Brief Departure

It's been a bit quiet around here for a spell. Don't fret! Things should return to some semblance of normalcy in the next short while. Life came knocking on my door and butted its head into my business, reminding me of a few things I needed to focus on. However, I shall have some sort of triumphant return post-NYE, so stay tuned!

And just in case you are wondering what I have been up to, here are a few shots to clue you in. Enjoy!


Tuesday, November 22, 2011

Spiced Green Tomato Cupcakes


With the onslaught of darkness and cold, most of us gardeners out there have likely spent the last few weeks turning our gardens from summer wonderlands of bountiful fruit into leaf-covered, compost piles that will yield happy soil come spring. Picking the last of the green tomatoes is always a favorite time of year for me as I use the opportunity to come up with spiffy new recipes for using them up. No wasting around here!


This time around I decided to make a batch of cupcakes with my green tomatoes. Using two recipes as a starting point, I eeked out a delicious cupcake akin to carrot cake. To top things off, I opted for a low-fat cream cheese frosting which made the cupcakes outstanding.


Hands down, these babies have been the most popular baked good I've made all year. As with most of the tasty recipes, I had to gift away as many cupcakes as possible to prevent devouring them all. I think I stopped myself after I had consumed six cupcakes in a row...


Now, I highly encourage all of you to grab those last few green tomatoes laying around the house or yard and make a batch of these for the upcoming holiday. As you sit there, licking your sticky fingers, smiling at the delicious goodness of these cupcakes...you can thank me. Enjoy! 

Spiced Green Tomato Cupcakes 
Inspired by: Spiced Green Tomato Cake 
  • 2 1/2 cups pureed green tomatoes
  • 1/2 cup butter
  • 1/4 teaspoon salt 
  • 2 cups white sugar
  • 2 eggs
  • 2 cups all-purpose flour
  • 1 teaspoon ground cinnamon
  • 1/2 teaspoon ground nutmeg
  • 1/4 teaspoon allspice
  • 1/4 teaspoon ginger
  • 1/2 teaspoon vanilla extract 
  • 1/2 teaspoon almond extract
  • 1 teaspoon baking soda
  • 1/4 teaspoon salt
  • 1/2 cup raisins
  • 1/2 cup chopped walnuts
Puree the green tomatoes in a food processor. Blend until smooth.

Preheat the over to 350 degrees F. Line a cupcake pan with cupcake liners.

Cream together butter and sugar for 2-3 minutes in a mixing bowl, until well incorporated. Add eggs and beat until creamy. Next add the vanilla and almond extracts and mix. Finally, add the pureed tomato mixture and mix.

Sift together flour, spices, baking soda, and 1/4 teaspoon salt in a separate bowl. Then add the dry ingredients to the creamed mixture, followed by the raisins and walnuts.

Pour the batter evenly into the cupcake pan, using 2/3 of a cookie scooper often works well.

Bake for 15 minutes or until a toothpick inserted into the cake comes out clean. Allow to completely cool before frosting.


Low Fat Cream Cheese Frosting
Inspired by: Cream Cheese Frosting Recipe 
  • 1/2 cup butter, room temperature 
  • 1 8-oz package of low fat cream cheese, room temperature 
  • 2-3 cups powdered sugar
  • 1 teaspoon vanilla extract 
With an electric mixer, mix the butter and cream cheese together, about 3 minutes on medium speed until very smooth. Scrape down the sides and bottom of the bowl to ensure even mixing.

Add the vanilla extract and mix. Slowly add the powdered sugar. Keep adding until you get to desired sweetness and thickness.

Either spread on with a blunt knife or spatula, or spoon into a piping bag to decorate each cupcake. Refrigerate any leftover frosting for up to 4 days. It tastes especially delicious eaten by the spoon. 


Thursday, November 17, 2011

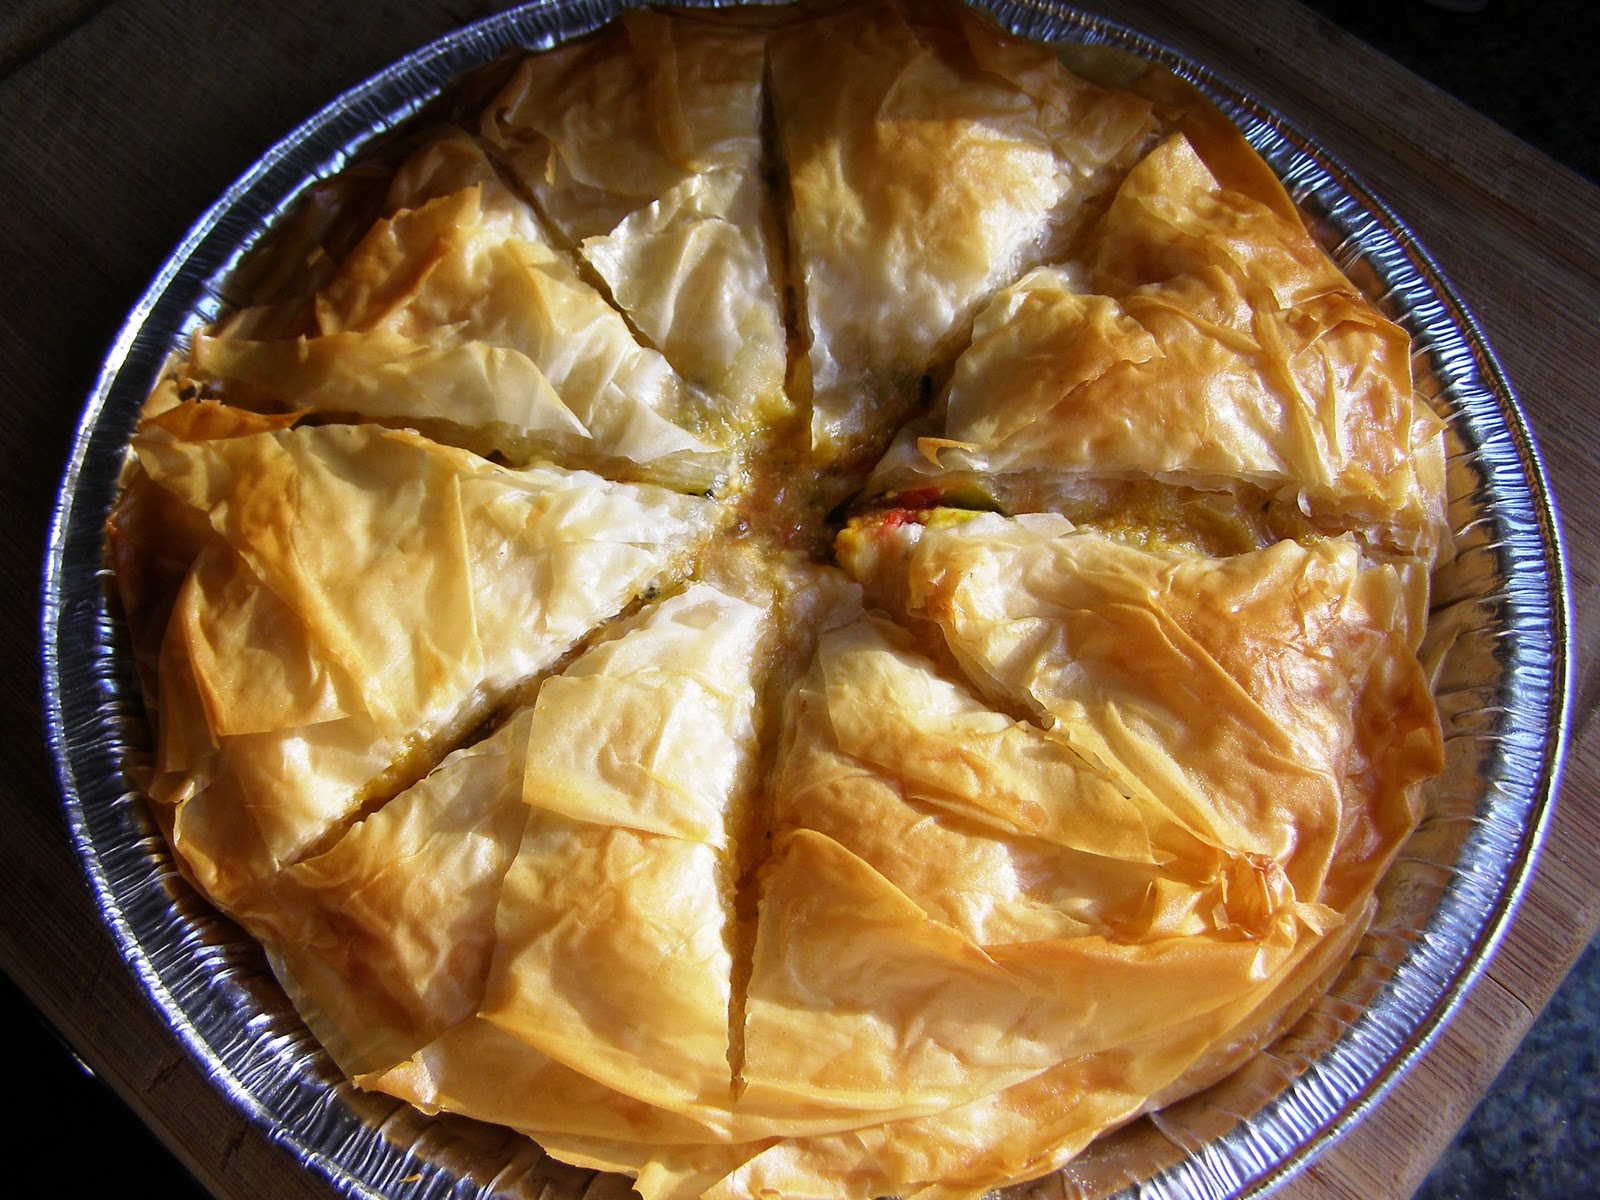
Mediterranean Vegetable Pie


There is talk of snow for the coming weekend. I don't know about you, but I am certainly not ready for snow. The lazy, golden days of summer are still a recent memory for me and I want to revel in them for as long as possible. My first 10k race of the cooler season is this Saturday, with a forecast for freezing rain. Oh Northwest, how you tease and torment me. 


To keep warm and happy during these gray days, I am trying to eat as many vegetables as possible. Hearty dishes filled with tasty ingredients and love. This included my version of a Perry's Plate recipe, the Mediterranean Vegetable Pie.


Not being a fan of eggplant, I opted out of that ingredient from the start. I also modified the recipe by using fewer tomatoes, as well as both red and green ones. The farmer's market had fabulous yellow beets the weekend I made this dish, hence how they found their way into the pie. This is definitely a comfort food kind of recipe, perfect for a cold day. Enjoy and stay warm! 

Mediterranean Vegetable Pie
Adapted from: Mediterranean Roasted Vegetable Pie 

  • 2-3 small to medium green tomatoes, halved and cored
  • 1 large red tomato, halved and cored
  • 2 yellow beets, diced 
  • 1 medium-sized zucchini, cut into 1/3-inch dice
  • 1 medium-size onion, halved and thinly sliced
  • 1/4 cup + 1 T olive oil 
  • Salt and freshly-ground black pepper
  • 3 garlic cloves, minced
  • 1 T each, chopped fresh parsley, basil, and oregano leaves
  • 4 ounces feta cheese, crumbled (about 1 cup)
  • 1 T rice wine vinegar
  • 4 T butter, melted
  • 8 sheets of phyllo dough (about 14x18 inches each), defrosted if frozen
  • Salt and pepper to taste 
Preheat the oven to 400 degrees F. Lightly oil a 9x13 baking dish and a large rimmed baking sheet or shallow roasting pan.

Arrange tomatoes, cut-side down, in a single layer in the baking dish. Roast for about 30 minutes, until tomatoes are tender and begin to turn brown in spots.

Meanwhile, toss the beets, zucchini, and onion in a large bowl with 1/4 cup of the heat-safe oil. Season lightly with salt and pepper. Arrange in a shallow layer in the other prepared pan. (No need to wash the bowl. You'll use it again later.)

Place the roasting pan in the oven with the tomatoes. Roast for about 30 minutes until vegetables are tender and beginning to turn brown, stirring every 10 minutes or so. If both pans don't fit in the oven together, place the tomatoes on the middle rack and the vegetables on the bottom rack. Rotate them a couple of times for even roasting. When you remove all of the vegetables from the oven, reduce the temperature to 375 degrees F.

When the tomatoes are cool enough to handle, pull the skins off. This should be easy, but don't worry about stubborn parts that stick. Combine the peeled tomatoes and roasted vegetables in the large bowl you used earlier. Add the garlic and fresh herbs. Toss to mix well, then gently mix in the cheese. Season lightly withe salt and pepper (to taste), adding the vinegar, if needed, to balance the sweetness of the tomatoes. DO AHEAD: You can make the filling up to two days ahead. Just cover and chill until it's needed.

Combine butter and remaining 1 T of oil. Brush some of the butter on the bottom of a deep 9 or 10 inch pie plate. Center 1 sheet of phyllo in the pie plate, allowing the edges to hang over. Brush the phyllo with a bit of butter. Top with 4 more sheets of phyllo, brushing each with butter before adding the next. (Arrange the sheets so there is excess hanging all around the pie plate instead of in just two places.) Spoon the vegetable and cheese mixture into the pie plate. Fold the edges over, brushing them with a little butter. Layer the remaining 3 sheets of phyllo over the top, brushing each layer with butter and either tucking the edges in the side of the plate or folding them toward the middle.

With a sharp, serrated knife, cut the pie into wedges through the top sheets only. Don't cut all the way through the bottom layer. Bake for 30 minutes, until crust is golden brown. (Maybe a few minutes longer if the filling has been refrigerated.)

Let the pie rest for 5-10 minutes before slicing and serving.

Sunday, November 6, 2011

MyLivingDays

Many of you wonder what I do with my time besides bake. Funny thing is, I actually do quite a lot that doesn't involve an oven and a taste tester. One of my most recent endeavors has been exploring other areas of writing beyond the foodie realm, specifically submitting work to share on MyLivingDays. A brilliant forum for sharing news, stories, lifestyle tips, foodie exploration, and just about anything else you can dream of, MyLivingDays has become a creative outlet of sorts for me. Easy to use, share, and comment, MyLivingDays coins itself a midlife magazine for those seeking to take a departure from other busy, confusing social media platforms. A close friend is one of the co-founders and has done me the wonderful service of reminding me that there is an entire world of stuff to write about, if I would simply put down the measuring cup for a while. We all have our vices, right?

Here are a couple pieces I recently contributed. Check their website frequently for updates as they are soon to launch a small suite of social tools. Feel free to join and contribute to the voice of the masses!

Family Trumps Oktoberfest
Fall Into Great Food
The Elephant Called Grief
Tips: Navigate Airports Like A Pro

Enjoy!!

Tuesday, November 1, 2011

Pear Panda Puffs


After the Mediterranean themed foodie fest from last month, I ended up with leftover phyllo pastry sheets. What is a baker to do? Create a new recipe, of course. And that is exactly what I did with these little bundles. 


I call them Panda Puffs due to their adorable size, tasty filling, and the way they leave a smile on your face when you are finished. Finger licking goodness right here. 


It's insane how easy it was to make these. After doing one batch and realizing this, I went back to the oven and made a second batch for my pals (primarily because I had eaten my way through the first one). 


My changes to the original recipe include adding more spices for a fuller flavor and marinating the pears in Frangelico (a favorite of mine). I even made a little pear Frangelico cocktail with the leftover marinade (uber tasty). 


Don't forget to let the phyllo sheets thaw out overnight in the fridge. It makes them much easier to work with. Enjoy! 


Pear Panda Puffs 
Adapted from: Spiced Pear Phyllo Bundles 

  • 16 sheets frozen phyllo pastry, thawed overnight in the fridge 
  • 3/4 c melted butter
  • 1/2 c sugar + more for sprinkling over the top
  • 1 tsp cinnamon
  • 1/2 tsp nutmeg (freshly grated is best)
  • 1/4 tsp ginger 
  • 1/4 tsp allspice
  • 4 large pears, cored, sliced & marinated for at least 1 hour in Frangelico 
  • 1 egg + 2 tsp water (beaten together for eggwash)

Core and slice pears, then marinate them in a small bath of Frangelico for at least an hour. The longer the better!

Mix together spices and 1/2 cup sugar, then set aside.

Brush a sheet of phyllo pastry with butter and sprinkle the entire surface with about 1 tsp sugar. Top with a second sheet of phyllo pastry. Brush half this sheet with butter and sprinkle with about ½ tsp sugar. Fold the sheet in half to make about a 9x12 inch rectangle which will now have 4 layers of phyllo pastry. Place a pear half in the center of the shorter side of the rectangle and spoon about 2 tsp of the sugar and spice mixture over the pear half. Fold the two longest sides of the pastry to meet at the center of the sheet covering the pear half. Roll up the pear in the phyllo, leaving the seam on the bottom of the pastry covered pear.

Repeat for the other pear halves.

Brush the tops of the pastries with the egg wash and sprinkle the tops with turbinado sugar if desired.

Place the pastries, seam side down on a parchment covered cookie sheet. Bake at 350 degrees F for 20-25 minutes until the pastry is evenly golden brown. Makes around 8 bundles.